Hi everyone! I’m really excited to share my first bullet journal post with you! I got everything that I wanted for Christmas- namely all bullet journaling supplies;)- and for the past couple of days I’ve been journaling like crazy. In this post I’ll be showing you what my set-up looks like for 2018, and the tips and tricks that I’ve learned since started my journal. I apologize in advance because there’s going to be a gazillion pictures in here;)
First off, what is a bullet journal and how do I use one? Those are questions that I found myself asking a lot. The answers? A bullet journal is somewhere in between a planner, a diary, a goal log, a creativity outlet, and a habit tracker. You can customize it so that it tailors to your lifestyle and helps you to become more productive an aware of your habits. It might be a little confusing at first, but once you start to get into the rhythm it will get easier and more fun to use. Try and start simple and then snowball into more complicated spreads. Here is my take on a bullet journal…..
To get started, this is the journal I’m using. 
It’s 128 pages and is made by Joy Tree; you can find it on Amazon. I’ll leave a link to all the supplies I used down below, but don’t feel like you have to get any fancy equipment to start a bullet journal. Literally all you need is a notebook and a writing utensil. I like this journal because it came with an index built in, which is handy because I didn’t want to spend the time drawing all of those lines.
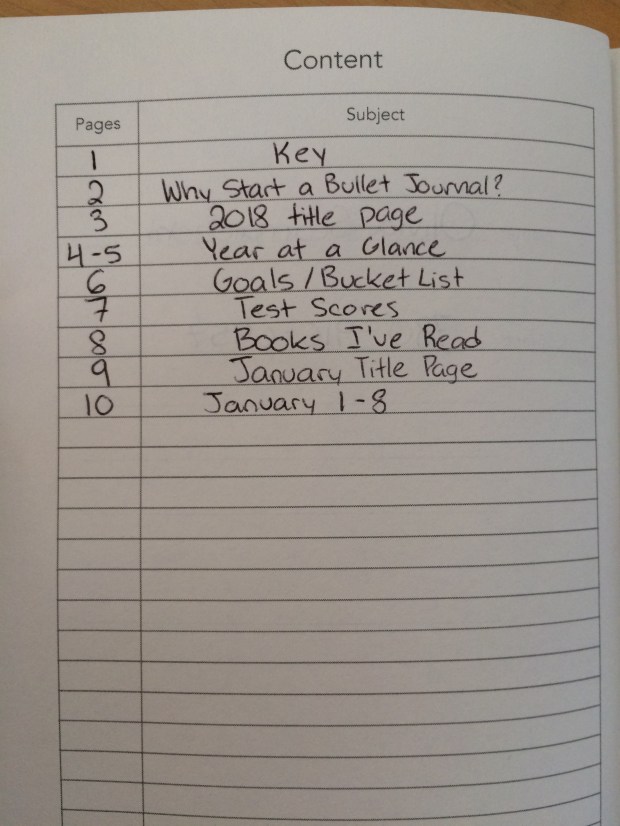
The first thing I put in my journal was a key, basically a guide to what different bullets and colours mean.
I recommend putting in a key so that you can easily separate different events and prioritize certain tasks. Of course, you key won’t look exactly like mine because everyone has different activities and priorities, but dividing your key into bullets, marks and colours will help to keep it organized. 
Next I put in a “Why Start a Bullet Journal?” page. This was just meant to take up a page so that the 2018 title page would be on the right side and I could start my calendar on a double-page, but I’m actually glad that I put it in because it will remind me why I started this journal: to be more organized, productive, etc. I will eventually add more reasons to that page. To the right of it, you can see my 2018 title page,. Title pages are probably one of my favourite things to set up in a bullet journal, because I like to find cool quotes and drawings to throw in there.

This is my year at a glance. (Sorry that I had to blur some things out for privacy purposes!) Here I used Crayola Super Tips markers and Tombow Dual-Tipped Brush Pens. I love both of these markers; the Super Tips because you can draw thick and thin and the brush pens because they’re great for calligraphy. Again, I’ll leave links at the bottom of the post but don’t feel like you need to use them. I included these pages so that I can look at every month for birthdays and events, plus I like it because I can check to see what days of the week certain events are on as well. This is great for planning ahead;)
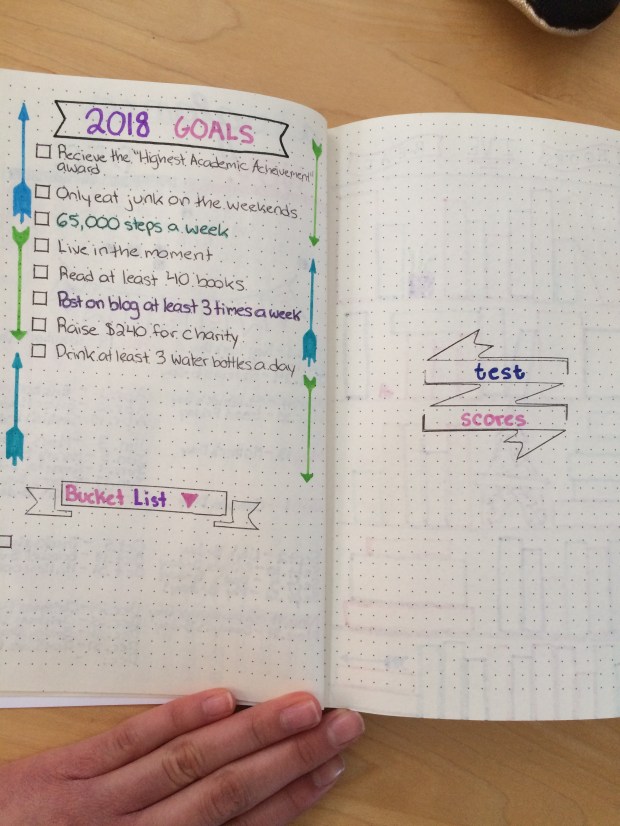
Moving on to my goals and bucket list page! I love these because I can keep track of what I want this year to be like for me. Keeping a list of goals and things that I want to do in 2018 will motivate me to get them done. And then on the next page I have space for writing down all of my test scores, because that’s something that I want to keep track of. But don’t forget to do what works for you, or you’ll find that bullet journaling will get boring and counter-productive pretty quickly. Some ,ore ideas of what you can put in your journal are expense trackers, doodle pages, and contact lists.
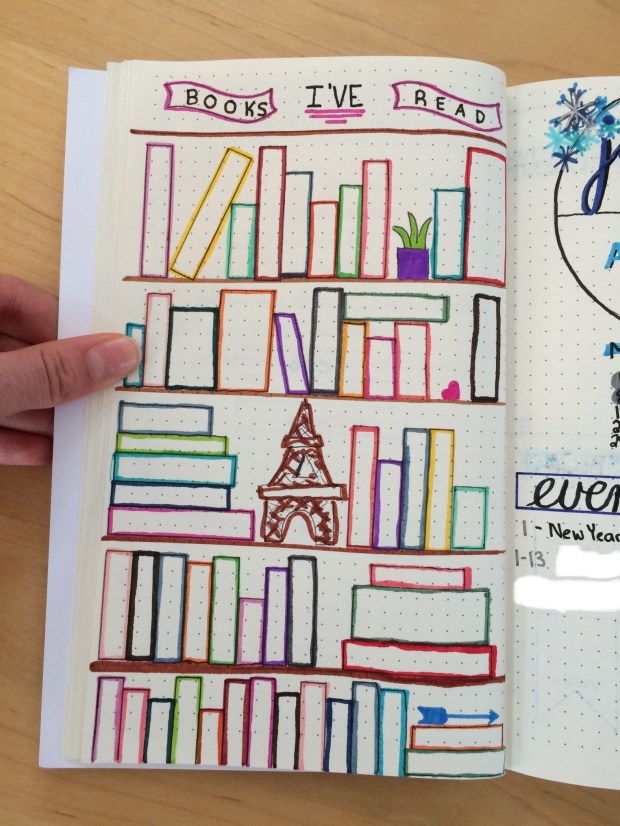
Ok, this is probably my favourite page in the whole journal! In 2018 I really want to start keeping track of all the books I’ve read. To make it fun, I decided to make it look like a bookshelf and I’ll write the title of each novel I read into a book, which is an idea that I saw on Pinterest. Speaking of Pinterest, make sure to follow me at MyDayIsBooked for bullet journal inspiration;)). I tried to add little knick knacks onto the shelves for added interest, but my Eiffel Tower really failed! LOL. If you’re not big into reading, you can add a list of movies to watch or games to play as well.

On to the January title page. I think that this turned out pretty good. I need to work on my calligraphy a ton, but it’s coming along! My favourite part is probably the circle with the word January and the quote inside of it, it looks super cute. One thing I found challenging about this experience is that there’s only 128 pages in my journal, and I used 8 at the beginning, so I have 10 per month now. I know that sounds like a lot, but each week requires 2 pages, so I’m already down to 8 pages a month. I had to squeeze a little calendar, my goals and event on the title page so that I would have room for a monthly recap. But that’s all part of the journey- this project is probably going to improve my problem solving skills and teach me that it’s ok if something isn’t perfect!
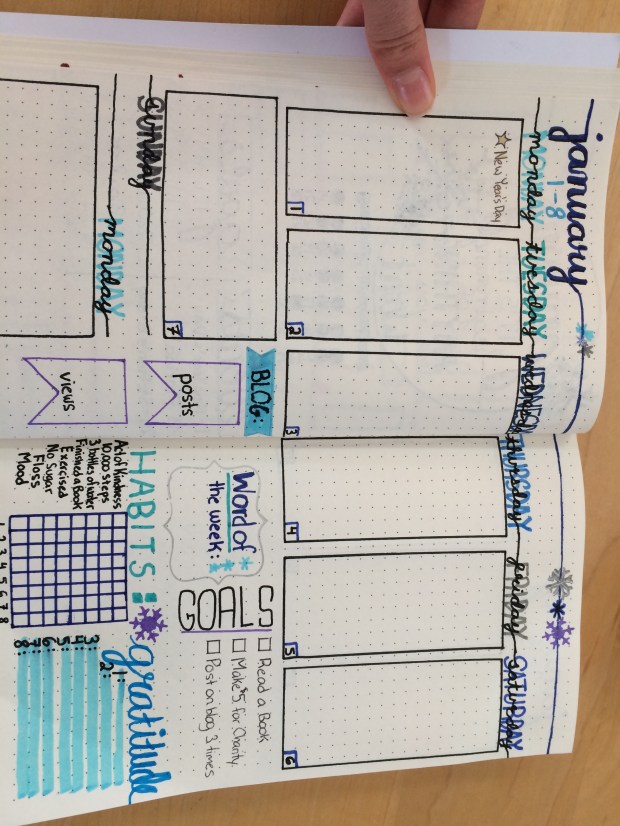
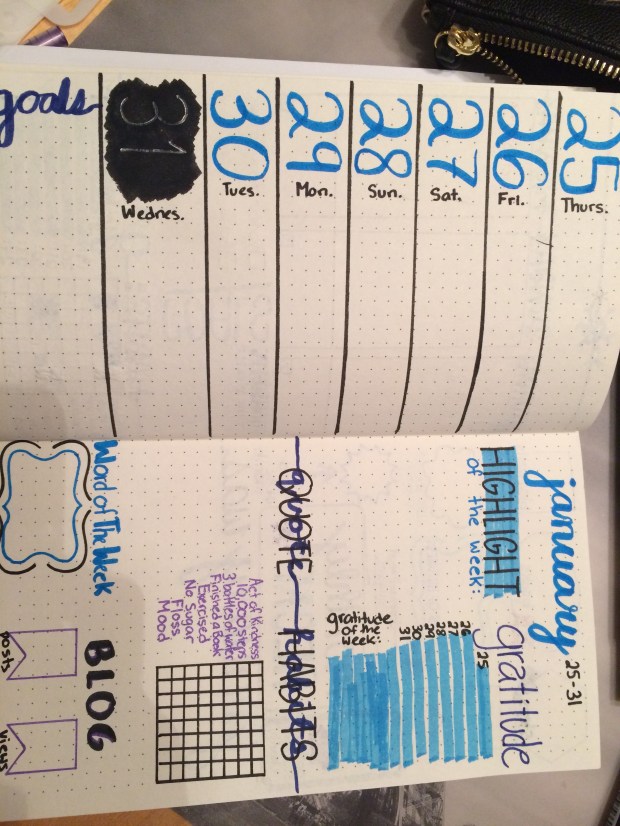
This is my first weekly spread. I wouldn’t have minded doing a monthly spread as well, but my pages are limited! That’s why these pages look a bit busy. Besides a space for each day, I included a space to record my blog posts and views, a “Word of the Week” area, a habit tracker, and some lines to write one thing that I’m grateful for each day. I think that I will probably change the layout and design of it pretty frequently so that I don’t get bored;)), but I’ll see how it works for me. For this spread, I used my brush pens, markers, some glittery gel pens, and bullet journal stencils. I had never heard of the stencils before I got them for Christmas, but they come in handy when you want to do repetitive things consistently and you’re not the greatest drawer (me!!). There’s some pretty neat icons, banners and boxes you can do with them too. Here’s a pic:

Ill try to find a link for them as well.

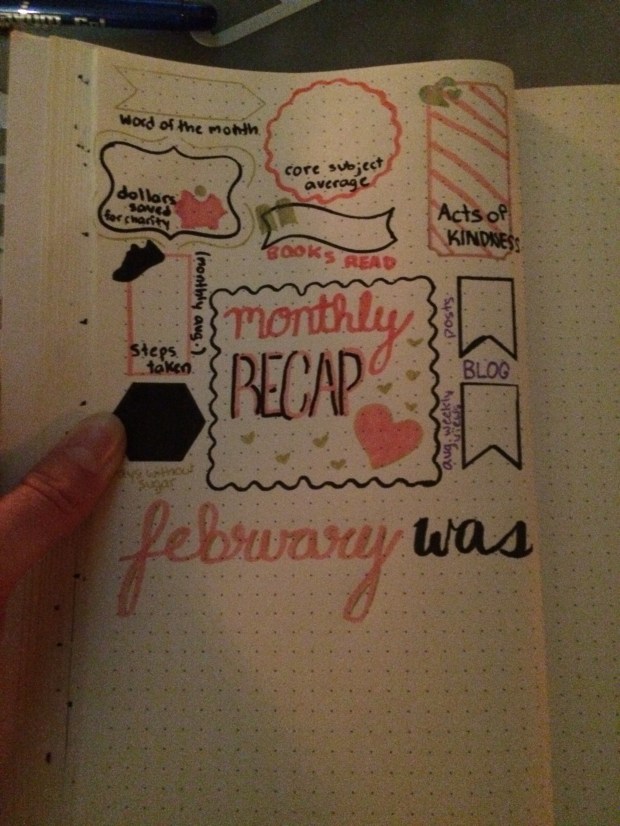
I haven’t gone so far as to complete any other spreads yet, but I’ll post when I have. The picture above is of my monthly recap page. I put it at the end of all my January spreads. I thought it might be nice to have a page where I can record all of my steps, books read, blog info and habit tracker stuff in one place. At the bottom there is also a “January was….” section where I can write down my favourite memories and just whatever happened that month. I thought this might be a cool addition so that I can look back on it at the end of the year.
So, that’s my set-up for 2018! Remember to make a bullet journal that suits you to maximize the use you’ll get out of it, and to change things up once in a while to keep it interesting. I’ll be on Pinterest pinning more great ideas for you guys, and at the end of this month I’ll do another post regarding my February layout. Leave some comments down below if you have any suggestions for what my theme should be next month, or if you have any questions regarding bullet journaling. See ya later!!
Yours Truly, MyDayIsBooked;))))
Supplies Links:
Bullet Journal
Brush Pens
Super Tips
Stencils