Cauliflower Rice Salad

Hey guys! Today I have a very nice, bright and fresh salad for you that is the perfect base for any protein! It’s full of veggies and has an AMAZING parsley and cilantro dressing that’s whipped up in the blender. The cauliflower base of the salad is created in the blender as well… and let me tell you, I’m loving it!

If sweet potatoes in the microwave isn’t life changing enough, let me introduce you to riced cauliflower! I had half a cauliflower in the fridge waiting to be used up, and I thought I’d do a little something different with it. So I cut it into chunks and tossed it in the blender- yes the blender- and was left with some perfect cauliflower “rice” that makes an amazing base to this salad! I’m really excited to do even more cool stuff with this rice substitute in the future- I stored my extra cauli rice in the freezer for later use. So yes, expect a storm of cauliflower rice recipes coming your way soon:))

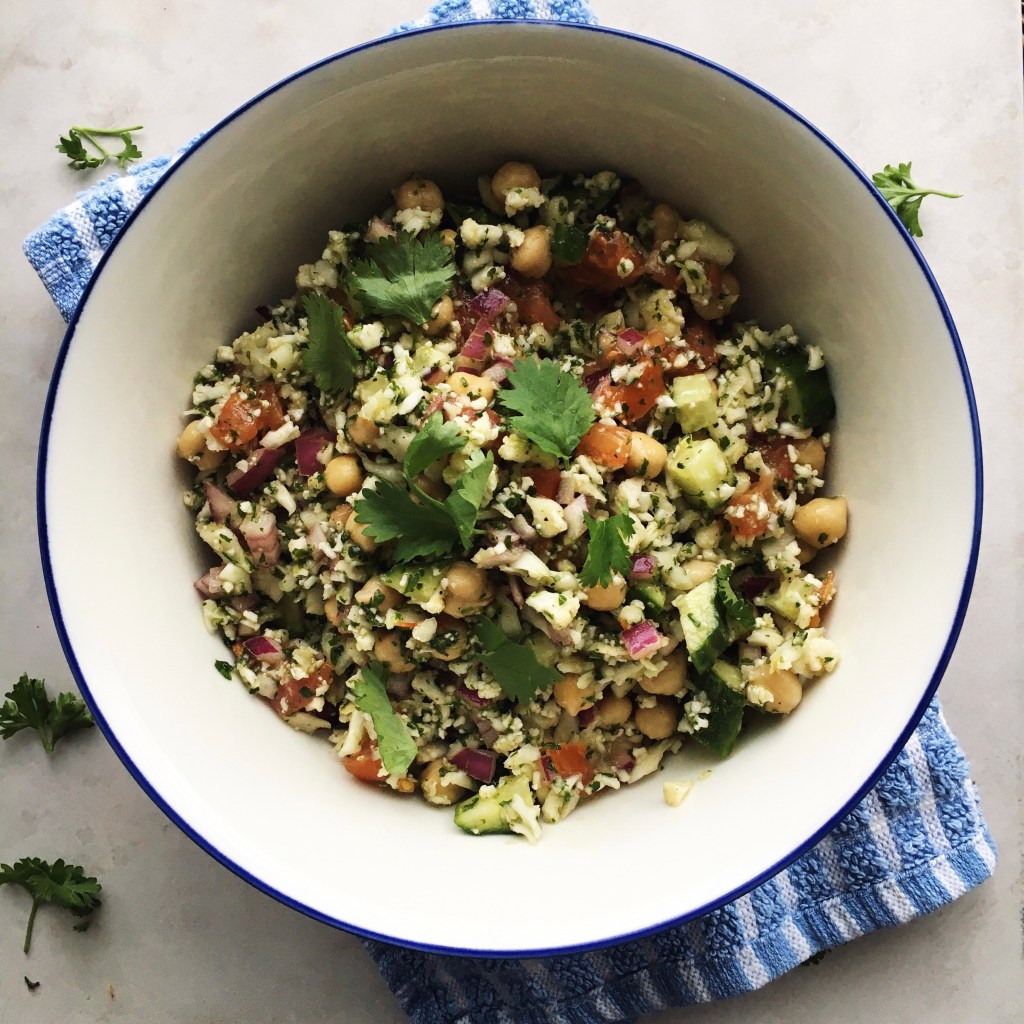
In addition to those little grains of cauliflower, this salad has a bunch of other fresh veggies, including cucumber, tomato, chickpeas, and red onion! Definitely getting some nice Mediterranean vibes from this recipe. That red onion adds some extra flavour- onions rock, just so you know. And those chickpeas add a bit of protein so that the whole thing is more filling. This salad is definitely great by itself, but if you’re looking for a more substantial meal you can DEFINITELY top it with a delicious protein of your choice. Some proteins that would be great with this salad are:

  • Chicken breast
  • Steak
  • Boiled eggs
  • Canned tuna
  • More beans

Whipping up a big batch of this and preparing some proteins is a great meal-prep option, and also makes for a great quick and easy school lunch!

Let’s talk about the dressing- it’s pretty darn good. Even though it’s really simple, the bright herb flavours really shine through! I used lots of cilantro and parsley, and brought in some lemon juice for that acid. With some olive oil and the addition of garlic and some salt and pepper, the dressing comes together beautifully! Trust me, this is a container of green gold right here.

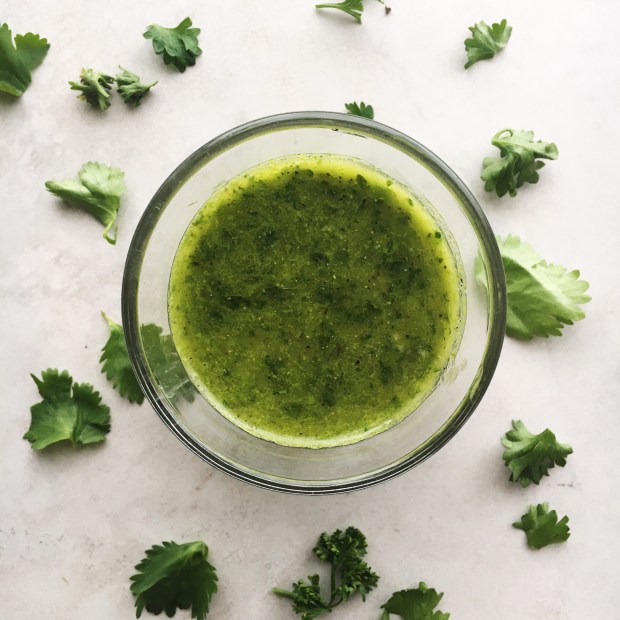
So so good! This dressing coats all of the salad ingredients and amps up the flavour of all of the veggies.

This recipe is definitely a quick and easy winner- perfect for a quick lunch or dinner, super fresh and healthy, and VERY TASTY. Enjoy!

Yours Truly,

Olivia:))

Cauliflower Rice Salad

  • Servings: 2-4
  • Print

To Make the Cauliflower Rice: Add cauliflower florets to a blender or food processor, and blend until evenly chopped and rice-like in texture. Alternatively, you can grate the cauliflower!

Ingredients

For the Salad

-1 1/3 cups riced cauliflower

-1 cup canned chickpeas, drained and rinsed

-1 tomato, diced

-1/4 of a cucumber, diced

-1/4 of a red onion, diced

For the Dressing

-1/4 cup packed parsley

-1/4 cup packed cilantro

-1/4 cup olive oil

-Juice of 1/2 a lemon

-Salt and pepper to taste


Directions

1. Combine all of the dressing ingredients in a blender and set aside.

2. Mix together the salad ingredients in a large bowl, add in the dressing, and toss everything to combine.

3. Serve with a protein of choice.


5 Minute “Baked” Sweet Potatoes

I have a VERY deep love of sweet potatoes, and my obsession has only grown after rediscovering this method of cooking them. It takes five minutes, is super easy, and is done in- wait for it- the MICROWAVE. That’s right, we’re making some baked potatoes in the microwave, and I promise you that after trying them out you will never go back to the oven🙌

Don’t get me wrong, I still love some good roasted or air fried sweet potatoes. I love when they get all crispy! But when I’m looking for a quick sweet potato fix, this method is the best. You’re basically steaming the sweet potato in the microwave by wrapping it in a damp paper towel and then cooking it on high for about 5 minutes, flipping halfway through. This super simple technique is a game changer because it allows you to whip up some delicious potatoes on short notice, instead of waiting 30-40 minutes for them to roast in the oven.

I remember that I saw this idea somewhere on social media a couple of years ago and was only cooking my sweet potatoes this way before I discovered roasting them. But I don’t know why I stopped this microwave magic altogether- now that I’ve remembered how awesome it is I can’t wait to start making sweet potatoes more quickly! What I have in mind is making quick sides for dinner, super fast and delicious school lunches, and last minute additions to salads and bowls.

I hope this method changes your guys’ lives as much as it’s going to change mine!😂 If anyone’s down to start a sweet-potato-cooking-technique-discussion-group let me know because I will be the president✌️

5 Minute “Baked” Sweet Potatoes

Serves: 1

Total Time: 7 minutes

Ingredients:

  • 1 small sweet potato, washed and cleaned (any eyes or blemishes removed)
  • Hummus, chives, avocado, beans, or plain yogurt for topping (optional)

Directions:

  1. Grab about 2-3 connected sheets of paper towel and soak them under the tap. Wring them out until no more water comes out, and the towels are damp.
  2. Use a fork to poke about 10 holes all around the sweet potato. Wrap it in the damp paper towels, place on a plate, and microwave on high for 2 minutes and 30 seconds.
  3. Take the potato out of the microwave, flip it over, and microwave for another 2 minutes and 30 seconds, or until the potato is cooked all the way through.
  4. Unwrap the potato, cut open the top lengthwise, and top with hummus, plain Greek yogurt, chives, or avocado, or add to your favourite bowls and salads.
  5. Enjoy!

There’s a super simple recipe for you on a Saturday! Have a great rest of your weekend and get ready for more tasty recipes coming next week:)

Yours Truly,

Olivia;))

Coconut Curried Vegetable Rice

Hi friends! It seems that there’s a theme running through my recipes this week, and that theme is SIMPLE DELICIOUSNESS. Maybe you don’t think of curry being that simple. But guess what, this one is. We’re making good use of the stuff you’re already got in your spice cupboard and pantry and we’re making it into something super tasty.

I wanted to make some sort of curry paste for this, but I didn’t have many of the traditional curry paste ingredients. So I made my own take on a curry paste, using common ingredients that I DID have. We’re talking chilli powder, ground ginger, soy sauce, basil, curry powder, lemon juice, and a bunch of other good stuff. I like the concept of this paste because if you don’t want to make curry out of it right away, you can put it in the fridge for a few days until you’re ready to use it.

It’s also great because it acts as your flavour bomb for the whole curry! All of the spices and flavour you need for the whole dish is found in it, making for a super easy single application of amazingness.

All of the veggies in this dish really sing too. I love a good rainbow in my curries, and almost any veggie would work in here, so feel free to do some substituting with what you have and what you like. I personally found my own heavenly combo of mushrooms, onions, bok choy, red peppers, and carrots to be very nice.

The vegetables get cooked down together in some coconut oil, then sauteed a bit more when the curry paste is added, and then everything simmers together in some coconut milk. To make this heartier and more of a one-pot meal, I thought, why not add in some rice? So brown rice gets thrown in too and cooked in all of the delicious flavours.

Once this curry is done, your house will definitely smell really good and you’ll have a few meals worth of awesome curry rice stocked up in your fridge. I love how flavourful this is, and how it has just the perfect amount of spice! Plus, it goes great with any protein you choose to add, and is so hearty and comforting.

Hope you enjoy!

Coconut Curried Vegetable Rice

Serves: 3-4

Total Time: 70 minutes

Ingredients:

For the Curry Paste:

  • 1/2 tbsp chilli powder
  • 1/2 tbsp ground cumin
  • 1 tbsp ground ginger
  • 1 tsp dried basil
  • 1 tsp crushed red pepper flakes
  • 1 tsp curry powder
  • 1 tbsp soy sauce
  • Juice of 1/2 a lemon
  • 3 cloves of garlic, minced
  • 1/4 of a white onion, diced

For the Coconut Curried Vegetable Rice:

  • 1 1/2 tbsp coconut oil
  • 1/4 of a white onion, sliced
  • 1 red pepper, sliced
  • 1 large carrot, peeled and chopped
  • 4 white mushrooms, sliced
  • 8 stalks of baby bok choy, cut into halves
  • 1 serving of Curry Paste (above)
  • 1 400ml can of coconut milk
  • 2/3 cup brown rice
  • Salt and pepper to taste

Directions:

  1. To make the Curry Paste, combine all of the curry paste ingredients in a blender or food processor until a paste-like consistency is reached. Don’t worry about small chunks of onion; these will be cooked in with the curry. Use immediately to make Coconut Curried Vegetable Rice or store in the fridge for up to 3 days before using.
  2. Heat the coconut oil in a large, deep skillet. Add in all of the veggies for the curry and cook until the onion is translucent and the peppers are beginning to soften, about 6-8 minutes.
  3. Add the curry paste to the pan and sautee for another 2 minutes.
  4. Dump the coconut milk into the pan and give everything a good stir to combine. Season generously with salt and pepper, and stir in the brown rice.
  5. Bring the contents of the pan to a simmer and turn the heat to low, covering the pan and letting the curry cook for 35-40 minutes, until the rice is completely cooked through.
  6. Remove the pan from the heat season more to taste with salt and pepper, serve warm and enjoy!

I love this recipe so much and I hope you guys do too! See you Friday:))

Yours Truly,

Olivia;))

Fresh Baked Falafel

Hey guys! Welcome to my first recipe of 2021- I wanted to start the year off right and this recipe is SO GOOD. We’re making amazing homemade falafels that are packed with flavour and are super healthy too! All you’ve gotta so is follow three simple steps; blend, shape, then bake, and you can be poppin’ these bites of deliciousness into your very own mouth.

First off- blend! You’ve heard of a one bowl recipe, but have you ever heard of a no bowl recipe? Probably not until now, but that’s right- this recipe calls for no bowl and only one blender or food processor. All of the fresh and amazing ingredients for our falafels are being thrown in there and simply combined until a nice, even consistency is reached. I didn’t call these FRESH Baked Falafel just for fun either. We’ve got fresh parsley, freshly squeezed lemon juice, minced garlic, chopped onion, and so many other ingredients to make these chickpea nuggets come to life! I also used some oat flour to bind everything together, but if you prefer to use another kind of flour you can go ahead.

Step two- shape! I got out a little spoon, scooped tablespoon sized amounts of falafel mixture into my hands, and formed them into flat patties. This shape is the best for baking because the outsides get nice and browned while the inside still cooks all the way through. This step is pretty straight forward, and also fun and kind of messy.

Finally- bake! These babes bake for fifteen minutes on one side, then get flipped and bake for another fifteen. The result is a golden brown, toasty falafel that is amazing on or in just about anything. Bowls, salads, wraps, sandwiches; you name it, these will take it up a notch. I recommend making a double or triple batch, freezing them, and pulling them out when you want something fast and tasty.

Hope you enjoy these amazing Fresh Baked Falafels!! Let me know how they turn out when you give this recipe a try:)

Fresh Baked Falafel

Serves: Makes 9-10 Falafels

Total Time: 50 minutes

Ingredients:

  • 1 can of chickpeas, drained and rinsed
  • 1/2 cup fresh parsley
  • 1/4 cup oat flour
  • 1/2 a white onion, chopped
  • 2 cloves of garlic, minced
  • 1/2 tbsp tahini
  • 1 tbsp lemon juice
  • Salt and pepper to taste

Directions:

  1. Preheat your oven to 400 degrees Fahrenheit.
  2. Add all of the falafel ingredients to a blender or food processor and blend until everything is completely combined.
  3. Scoop the mixture out from the blender by tablespoon fulls and form into discs about 1/4 inch thick. Spread them out on a parchment lined baking sheet.
  4. Place the falafels in the oven and bake for 15 minutes. At this point, remove the pan, flip the falafels, and then place them back in the oven to bake for another 15 minutes.
  5. Take the falafels out of the oven, let them cool, and enjoy in bowls, salads, wraps, or sandwiches, or just dip in hummus.

Have fun making and eating these Falafels! See you guys Wednesday with another great recipe:)

Yours Truly,

Olivia:)))

Candied Walnut Popcorn

MERRY CHRISTMAS!!!! Hope you’re all having an amazing day so far! I know this Christmas looks a little different than past years, but hopefully you guys can find some way to hang out with family, whether it be virtually or with a small, socially distant group in person.

For a fun and festive Christmas recipe, I thought I’d share a delicious popcorn mix! It’s a quick and easy recipe that you can whip up while celebrating the holiday. The walnuts are beautifully candied in some maple syrup on the stove, making them tender and sweet, balancing perfectly with the salted popcorn! I also threw some cinnamon in there for some extra Christmas flavour.

Also, we’re making our popcorn from scratch! Of course, you can use pre-made popcorn if you want to speed things up even more, but making your own is surprisingly easy and healthier. You’ve just got to heat up the oil, toss in the kernels, and listen to them pop! Plus you can season to your own taste with salt.

I’m going to keep this post short today so you can get straight to the recipe and go back to making holiday memories! I hope you enjoy this recipe and have a great rest of your day:)

Candied Walnut Popcorn

Serves: 4

Total Time: 20 minutes

Ingredients:

  • 2 tbsp coconut oil
  • 1/3 cup popcorn kernels
  • 1 1/2 cups walnuts
  • 2 tbsp maple syrup
  • 1/2 tsp cinnamon + more to taste
  • Salt to taste

Directions:

  1. Heat the coconut oil in a large pot over medium-low heat.
  2. Add in the popcorn kernels to the pot, and put on the lid, leaving it slightly ajar so that the steam can escape. Listen to the kernels pop! When the popping slows, remove the pot from the heat.
  3. Season the popcorn to taste with salt.
  4. In a small pot, combine the walnuts and maple syrup. Put the pot on the stove over medium-low heat, and wait for the maple syrup to come to a slight simmer. Keep stirring the walnuts and maple until the maple syrup begins to caramelize and turns into a sticky coating on the walnuts, about 3-5 minutes.
  5. Take the pot off of the heat and let the candied walnuts cool for about 2 minutes before adding them to the popcorn. Mix everything up and season to taste with some more salt and cinnamon.
  6. Enjoy!!

Merry Christmas and I’ll see you soon with my 2021 Bullet Journal Set-Up! I’m so excited:))

Yours Truly,

Olivia:)))