Marinated Mushrooms with Tomatoes

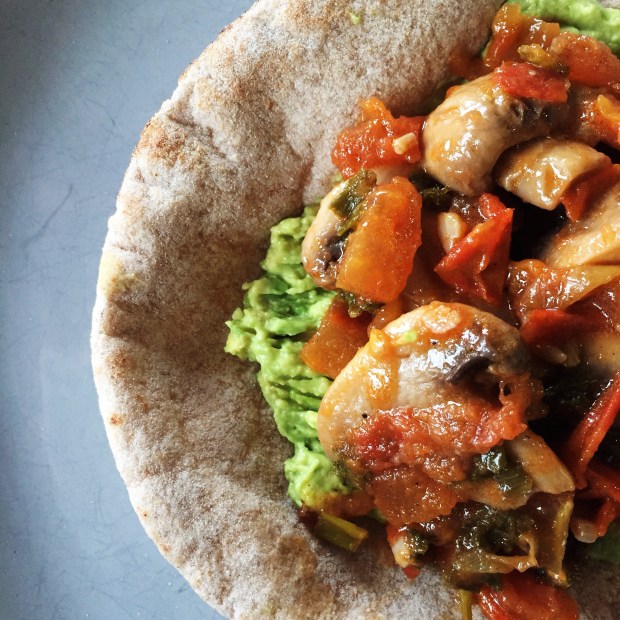
Mushrooms are the best man! They’re so meaty and full of deliciousness. Which also means that they stand up great to AWESOME MARINADES like this one! Honestly, I feel like marinating a mushroom is the only way to eat it after eating these mushrooms. Say that ten times fast. Seriously though, this marinade is full of herbs and garlic and all of the good stuff that you want in your mouth.

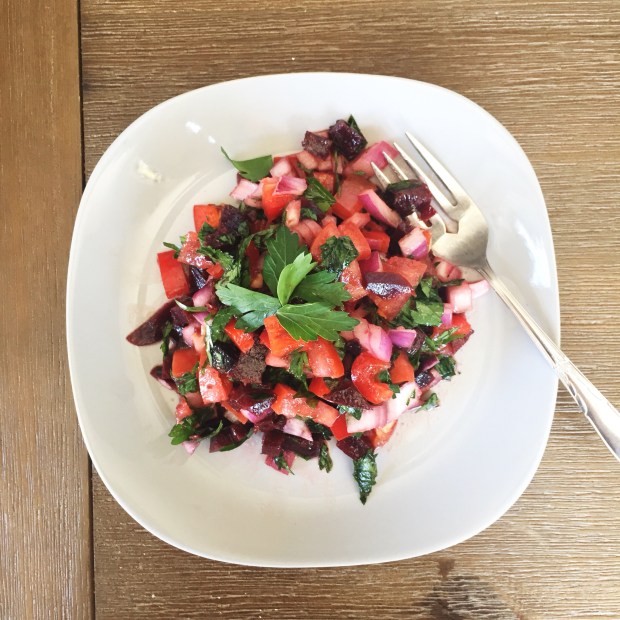
After a good hour or so of marinating, everything goes into the pan with some tomatoes to get cooked down and delicious. At this point you can try to resist the urge to eat them all right there and eat them in a wrap, on some avocado toast, or as a little side salad. All of these options are amazing! If you’re not a mushroom fan, I definitely think that this recipe will convert you. Give it a try!

Marinated Mushrooms with Tomatoes

Serves: 2

Total Time: 90 minutes

Ingredients:

  • 8 cremini mushrooms, halved
  • 1 tomato, diced
  • 1/4 cup packed fresh parsley
  • 1 clove of garlic, minced
  • 1 stalk of green onion, chopped
  • 3 tbsp red wine vinegar
  • 2 tbsp olive oil
  • salt and pepper to taste

Directions:

  1. In a small bowl, mix together the parsley, garlic, green onion, vinegar, oil and salt and pepper. Dump the marinade into a ziploc bag with the mushrooms, seal it, and give it a good toss to make sure the mushrooms are coated. Place the bag and the fridge and leave to marinate for about an hour.
  2. Heat a pan over medium heat, and add in the marinated mushrooms and the diced tomatoes. Cook for about 10 minutes, until the mushrooms and tomatoes are soft and most of the excess liquid has evaporated.
  3. Serve as a side, in a wrap, or on some avo toast!

Enjoy these amazing mushrooms!

Yours Truly,

MyDayIsBooked;))

Chocolate Dipped Pumpkin Seed Cookies

So, we have a lot of pumpkin seeds. Like A LOT. We got the 1.2 kilogram bag from Costco. I wanted to make some pumpkin seed butter out of them, because I don’t really like to eat them by themselves. But halfway through the blending process, my vitamix quit on me! This happens sometimes because it’s pretty old, and seeds are a pretty intense thing to blend. So I was like, now what? What can you make out of half-blended pumpkin seeds? It turns out that you can make something pretty fricking amazing.

I added some maple syrup to the seeds, pressed em into cookies, and TRIPLE DIPPED them in chocolate. That’s right. TRIPLE. DIPPED. These cookies are legit amazing. They’re so rich and nutty and sweet and just awesome! You only need four ingredients to whip them up, and if you have a really old blender no prob! It only needs to work for about two minutes.

My go-to chocolate dipping sauce is maple syrup, cocoa powder, and coconut oil. Super simple and so good. All you have to do is melt the ingredients together and you’re good. This sauce could also be used for pretty much anything else, like oatmeal, strawberries, other fruits, nice cream; the list goes on and on. On these cookies, it lends another hit of richness that is definitely welcome. If you’re not feeling the chocolate though, you can always omit and just eat the cookies by themselves. HA! That was a joke! DEFINITELY include the chocolate. I don’t know why you clicked on this post if you don’t like chocolate.

That’s my spiel for the day! I really hope you give these cookies a try because they will change your life. For the better.

Chocolate Dipped Pumpkin Seed Cookies

Serves: Makes 10-12 cookies

Total Time: 60 minutes

Ingredients:

  • 2 1/2 cups shelled and roasted pumpkin seeds (I used salted)
  • 2 tbsp + 1 tbsp maple syrup
  • 2 tbsp coconut oil
  • 1 tbsp cocoa powder
  • I’m not kidding that’s it

Directions:

  1. In a STRONG blender or food processor, blend the seeds until they start releasing oil but aren’t too loose. You want the mixture to be something you could form a ball with.
  2. Transfer the blended seeds into a bowl and stir in 2 tbsp of the maple syrup.
  3. Scoop the pumpkin seed mixture by heaping tablespoons and form into balls. Place on a parchment lined baking sheet or pan, and press down to make cookies about a centimetre thick.
  4. Place the cookies in the freezer for at least half an hour. You want them to be pretty frozen so that they’re easy to dip.
  5. Make the chocolate sauce right after you pop the cookies in the freezer. Melt together the cocoa powder, coconut oil and maple syrup in a small pot over low heat. Remove from the burner and let stand until the cookies are ready.
  6. After thirty minutes has passed, take out the cookies and dip them one by one halfway into the chocolate mixture, placing them back on the baking sheet. By the time you’ve reached the last cookie, the chocolate on the first cookies should be hardened because of the cold. Dip all of the cookies halfway again, and then once more to ensure optimal coverage.
  7. Place the cookies back in the freezer for another 10 minutes before serving. Store in an airtight container in the fridge.

Enjoy these little bites of deliciousness!

Yours Truly,

Olivia

Stove Top Baked Beans

Hey guys! The weather is finally getting nicer and nicer, and I’m really starting to miss those summer barbecues! While we’re all stuck at home, you can still have a taste of summer time. These Stove-Top Baked Beans bring together caramelized onions, garlic, vinegar, and spices to make the perfect side dish.

I feel like all of my recipes are super versatile right now, because it can be hard to get super specific ingredients. You can use pretty much whatever canned beans you’d like in this recipe. I used black beans and red kidney beans to keep it interesting. Beans are so good man! They’re definitely underrated but are a great source of protein. In this dish, they’re great as a side with another protein, or just with some pita or bread. The recipe below makes a pretty big batch, which you can always halve if you don’t want to make too much. Or double it and freeze some for later- I haven’t tried that yet but I’m sure it would be great for when you’re in a pinch and are craving some beans. And lets be honest, that was me all the time before quarantine started. Now I’m still carving beans but I have more than enough time to make em.

I also caramelized the onions more than usual in these beans, to give them extra flavour. You want them nice and soft and brown. Maple syrup gives this recipe some sweetness, and red wine vinegar cuts through the sugar. The result are some seriously good beans! And since I made them on the stove they take less time to make as well. How can you go wrong? Here’s the recipe.

Stove Top Baked Beans

Serves: 8 as a side (I have a lot of bean eating to do)

Total Time: 45 minutes

Ingredients:

  • 2 tbsp olive oil
  • 1/2 a medium sized yellow onion, diced
  • 2 cloves of garlic, minced
  • 1 tsp shawarma spice (or use smoked paprika)
  • 1/2 tsp cumin
  • 1/4 tsp cayenne powder
  • 2 cans of beans, drained and rinsed (I used black and red kidney)
  • 2 tsp pure maple syrup
  • 2 tbsp red wine vinegar
  • 1 can crushed tomatoes
  • Salt and pepper to taste

Directions:

  1. Heat the olive oil in a large pot over medium-low heat. Add the onions and garlic and cook until the onions are translucent, about 6 minutes. Add in the shawarma spice or paprika and cook for an additional 5 minutes, until the onions are soft and caramelized. Add water or more oil if the pot starts drying out.
  2. Put the beans, tomatoes, vinegar, maple syrup, cumin, and cayenne pepper in the pot and stir until combined. Bring the mixture to a simmer and then turn the heat to low.
  3. Cover the beans and let them cook for about 20-30 minutes. Remove from the heat, season liberally with salt and pepper, and enjoy;)

Hope these beans transport you to an awesome summer BBQ!

Yours Truly,

Olivia;))))

Loaded Maple Balsamic Salad

How’s it going guys? It’s starting to feel like summer vacation because the weather is finally warming up! I’m starting to establish some rhythm and being more productive, so that’s a plus. These posts are keeping me busy and thinking!

Sooooo I heard that lots of people don’t like salads. What’s up with that? I don’t know what kind of salads that they’re eating, but in my world, salads have hot veggies, cold veggies, protein, mashed avocado, and SICK dressings. Making salads is actually so much fun because you can play around with flavour combos and pretty much add whatever you want. Today I’m sharing the recipe for this Loaded Maple Balsamic Salad. And before you ask, yes, it is VERY loaded. You’ve got sauteed peppers and golden brown butternut squash, corn, carrots, cucs, spinach, avo, hemp hearts, and an awesome maple balsamic dressing. Is it even physically possible not to like that combo? I think not. Go check out the recipe!

Loaded Maple Balsamic Salad

Serves: 1 very hungry person

Total Time: 20 minutes

Ingredients:

For the Salad:

  • A handful of baby spinach
  • 1 tbsp olive oil
  • Half a bell pepper, thinly sliced
  • 1/2 cup cooked corn (I used frozen)
  • 3/4 cup frozen butternut squash chunks (If you don’t have these you can use roasted squash or sweet potato, and skip the steps related to the frozen squash)
  • Salt and pepper to taste
  • 1/4 of a large cucumber, diced
  • 1/2 a large carrot, shredded
  • 1/2 an avocado, mashed
  • A sprinkle of hemp hearts

For the Maple Balsamic Dressing:

  • 1 tbsp olive oil
  • 1 tbsp balsamic vinegar
  • 1/2 tsp dried rosemary
  • 1/2 tsp maple syrup
  • Salt and pepper to taste

Directions:

  1. Whisk the dressing ingredients in a bowl and set aside.
  2. Heat the olive oil in a small pan over medium heat, and add in the peppers to saute.
  3. While the peppers are cooking, bring some water to boil in a small pot and add in the frozen butternut squash chunks. Cook them for about 2 minutes, then drain and add them to the pan with the peppers.
  4. Cook the squash and the peppers until they’re soft and have some browning going on on the outside, about 6 minutes. Then remove from the heat and season with salt and pepper.
  5. In a large bowl, arrange the spinach, peppers and squash, carrots, cucumber, and corn. Place the mashed avocado in the centre, and top with the hemp hearts and maple balsamic dressing.
  6. Enjoy!!

I hope this salad changes your mind about salads. It’s the salad to end all salad discrimination!

Yours Truly,

Olivia;))

Beet and Parsley Salad

Hi there! I wanted to start by letting you know that this is my 200th post!! Crazy how time flies! I’ve loved every minute of working on this site, and I want to thank you guys for all of your support. Your likes and comments mean so much! To celebrate, I’ll be posting my top ten favourite recipes sometime this weekend, so be sure to check that out;)

Today I have a very colourful and fresh recipe to share- Beet and Parsley Salad! Other than roasting the beets, this recipes calls for very little prep and is a perfect lunch or side dish. I even used pre -roasted beets to cut down on prep time. Fresh herbs are great to work with and bring so much flavour. Paired with the earthy beets they really get a chance to sing! This salad is even better when it sits overnight in the fridge because it allows it to marinate in the dressing (which is a delicious combo of fresh lemon juice, red wine vinegar, and olive oil), but feel free to enjoy it right after you whip it up. Honestly, I wouldn’t blame you.

Beet and Parsley Salad

Serves: 4

Total Time: 10 minutes (using pre-roasted beets), 30 minutes (roasting the beets included)

Ingredients:

  • 1 beet
  • 1 tomato, diced
  • 1/4 of a red onion, diced
  • 1/2 a red bell pepper, diced
  • 3/4 cup packed parsley leaves (I used the flat-leafed Italian variety, but the curly leafed kind would work too)
  • 1 tbsp olive oil
  • 1 tbsp lemon juice
  • 1 tbsp red wine vinegar
  • salt and pepper to taste

Directions:

  1. If roasting the beet, peel it and dice it into small cubes. Preheat your oven to 400 degrees Fahrenheit, toss the beets in some olive oil on a parchment lined baking sheet, and roast for about 25 minutes. Remove from the oven and let cool completely before tossing with the salad.
  2. If you’re using a pre-roasted beet, make sure that it’s diced into small cubes. Toss the beet chunks in a bowl with the tomato, parsley, onion, bell pepper, lemon juice, olive oil and red wine vinegar.
  3. Season to taste with salt and pepper and enjoy!

**optional: let the salad sit in the fridge overnight in the fridge to marinate in the dressing**

Thank you so much for reading! Stay safe and I’ll see you again this weekend with my top ten favourite recipes;))

Yours Truly,

Olivia;))