🍀Shamrock Smoothie🍀

Happy St.Patrick’s Day! For those of you who don’t want a Shamrock Shake, I’ve come up with the recipe for a delicious Shamrock Smoothie;)It’s super simple and full of vitamins. Hope you enjoy!


Shamrock Smoothie

Serves: 1

Total Time: 5 minutes

Ingredients:

  • 1 ripe banana
  • 2 cups spinach
  • 1 ripe kiwi
  • 1/2 tsp matcha powder
  • 1/2 cup light coconut milk, water or almond milk (add more or less if you want your smoothie thicker or thinner)

Directions:

  1. Toss all of the ingredients into the blender, putting the softer ingredients on the bottom (banana and kiwi) and the harder ingredients at the top (spinach). Add the water or almond milk in at the end.
  2. Blend until smooth.
  3. Enjoy!

Have a great week everyone;))

Yours Truly,

MyDayIsBooked🍀🍀🍀


Chickpea Nutella

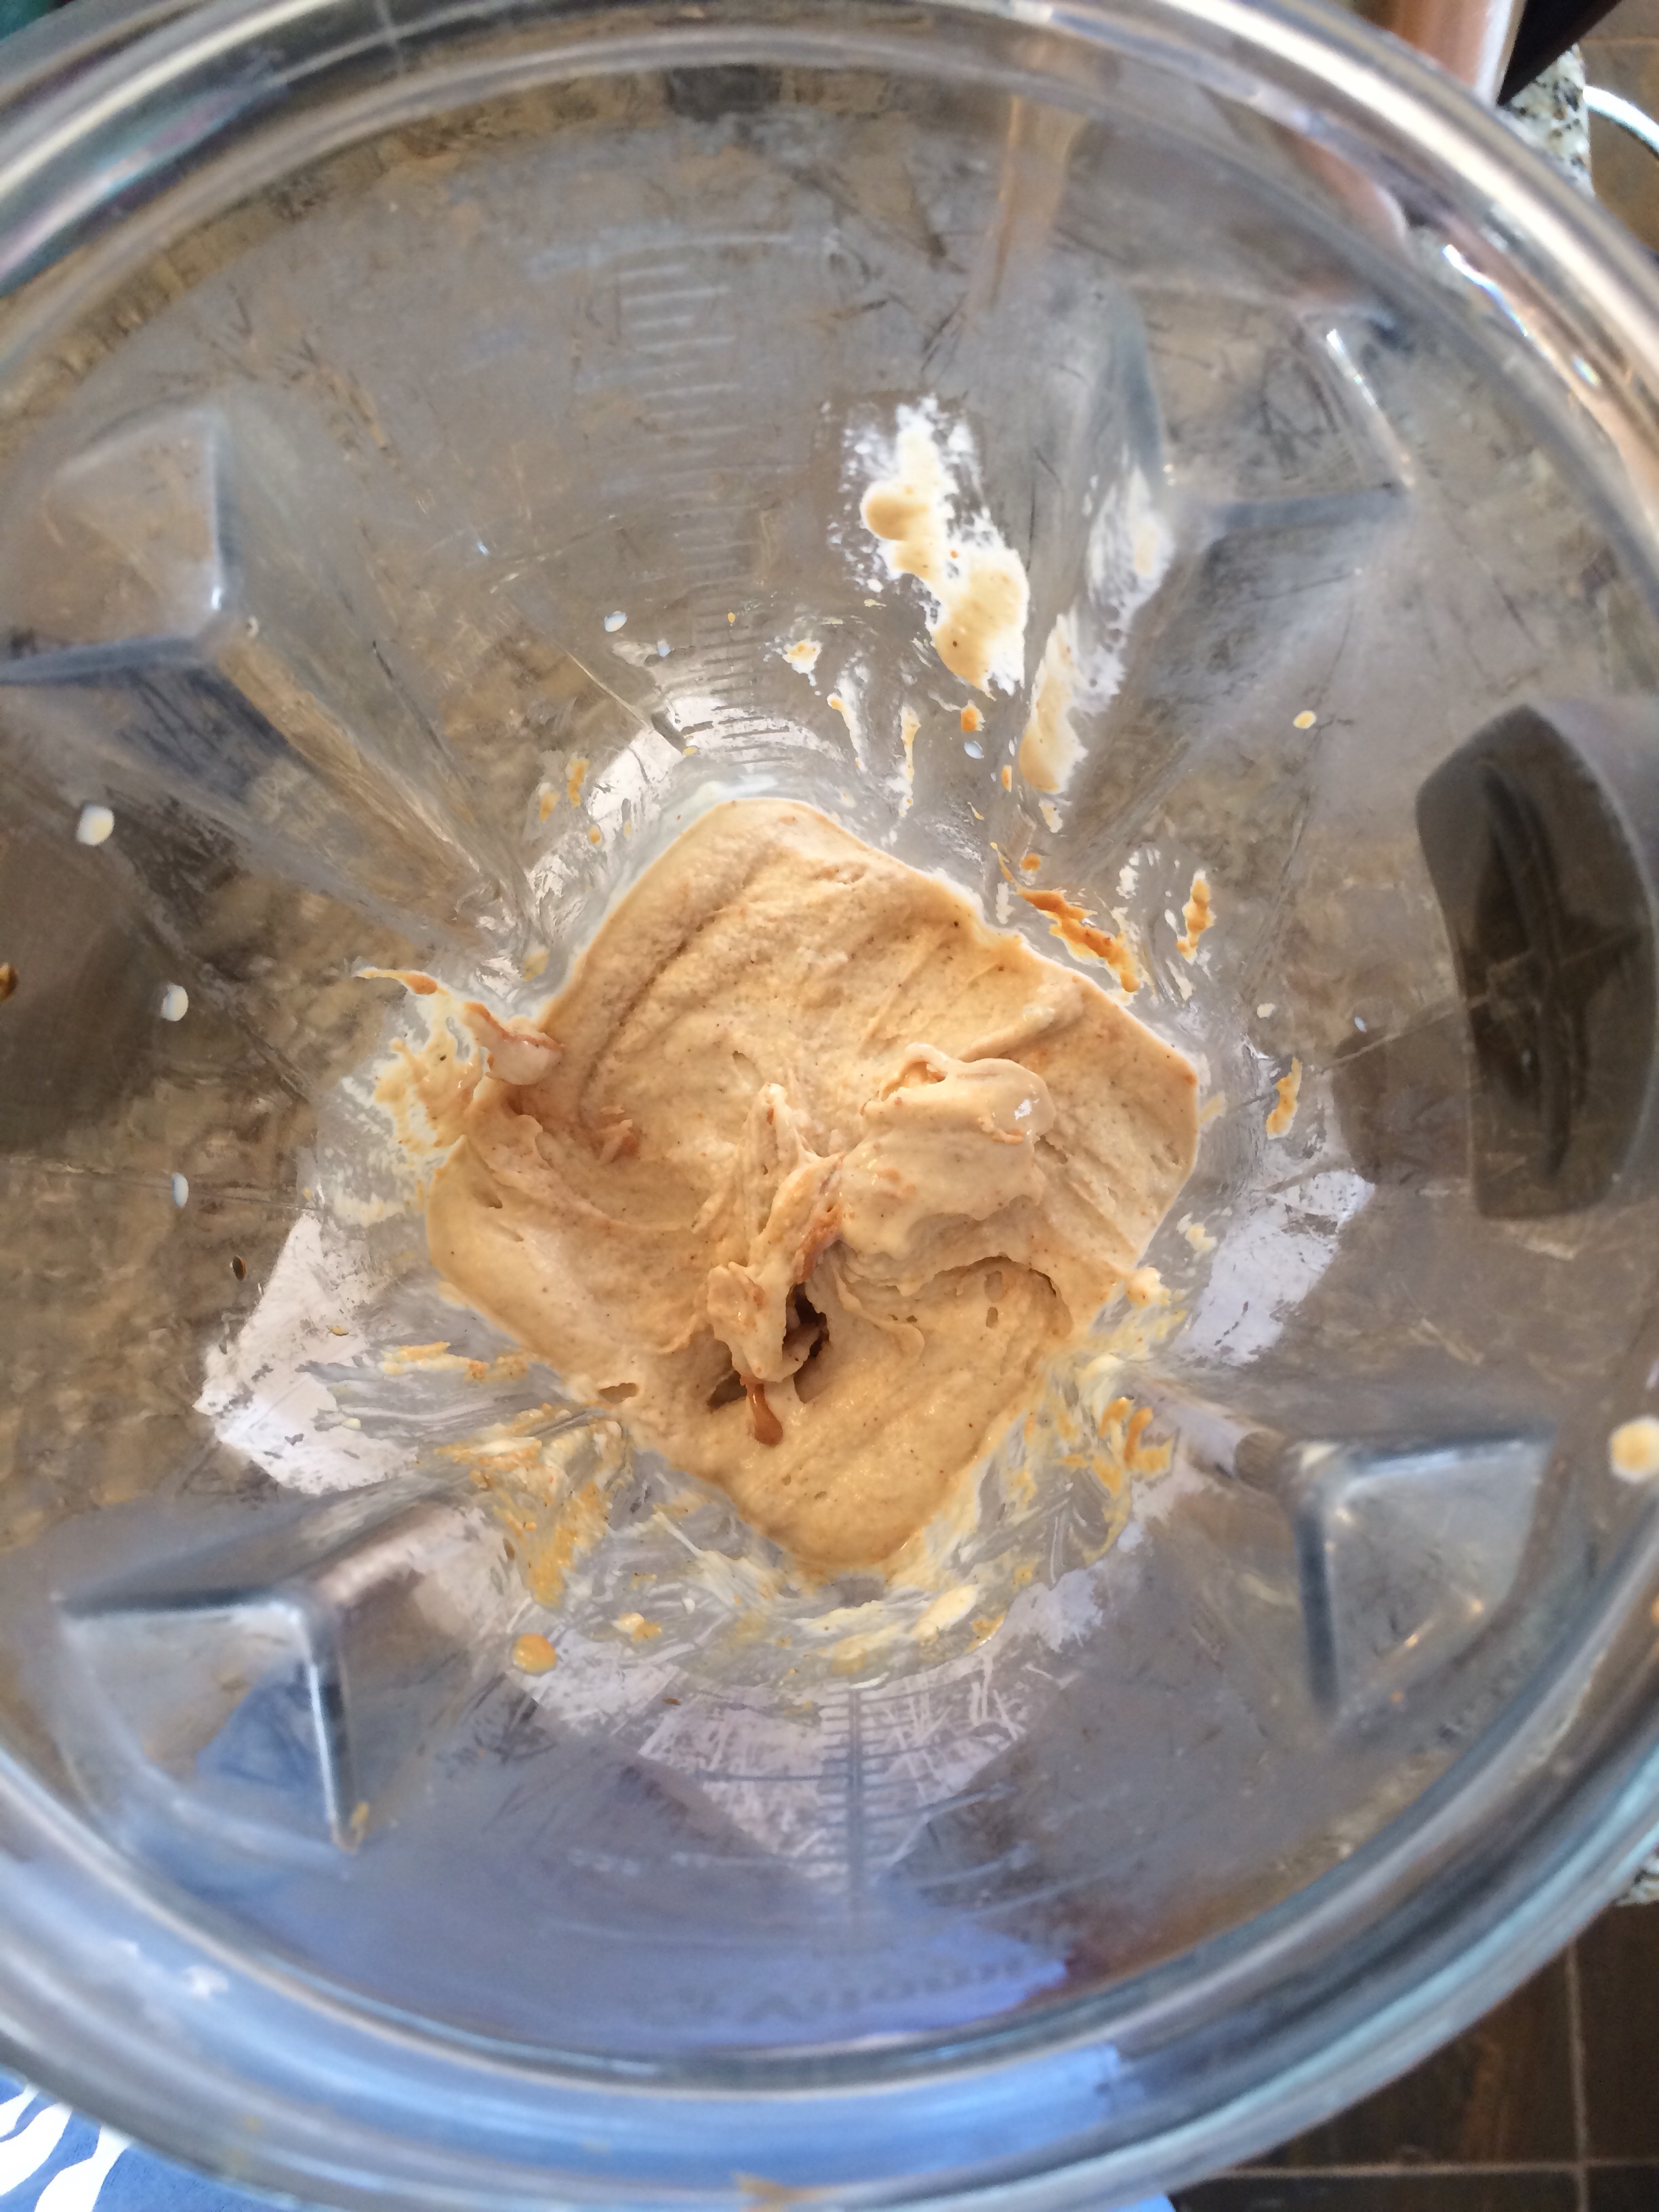
Hello again! I’m back, and this time you only had to wait ten days in-between posts! I think that’s a new record. Seriously though, this “Nutella” is amazing. If you’re skeptical about the whole chickpea thing, don’t worry, I was too. But the end result was this delicious chocolatey spread that goes well with just about everything. There is an option to add some peanut butter, which I obviously did, but if you’re sick of all the peanut butter recipes on this site than feel free to take a break from it! Personally, I don’t think I’ll ever get tired of peanut butter. Before I give you the recipe, I want to commemorate shaneandsimple.com for coming up with it:)

Ingredients:

  • 1 15oz can of chickpeas, drained, rinsed, and patted dry
  • 1/4 creamy natural peanut butter (optional)
  • 1 small ripe banana
  • 1/4 cocoa powder
  • 1 tsp vanilla
  • a pinch of salt
  • 2 tbsp water (or more; add until you reach your desired consistency)


Directions:

  1. Add all ingredients to a high-speed blender and blend until desired consistency is reached. Add more water if needed.


And……………. wow, that’s pretty much it. I think that’s the simplest recipe ever! Enjoy this spread on toast, with fruit, or anything else that needs chocolate on it! (Which is pretty much everything.) Thank for checking out this recipe! I’ll definitely be posting more in the summer – this darn invention called “studying for final exams” is killing my free time! Enjoy this spread in the meantime!


Yours Truly, MyDayIsBooked;))


PB Banana Creamsicles

Hi! I seriously can’t wait to share this recipe with you; I know I say this in every post, but these creamsicles are actually my favourite recipe of all time! They’re delicious, and made with some of my favourite things; you guessed it, bananas and peanut butter! I actually found this recipe on Pinterest, and would like to give a little shout-out to feedingyourbeauty.com for making my tastebuds super happy! These measurements make approximately 6-8 creamsicles, depending on how big your molds are. If you don’t have any molds, it’s all good! Freeze the creamsicle batter (do you call it batter?) as directed in my Very Berry Frozen Yogurt post. Without further ado, here’s the recipe for this creamy summer treat:

Ingredients:

  • 3 medium bananas, chopped and frozen
  • 2 tsp vanilla
  • 1/3 cup all natural peanut butter (salted and unsalted both work) plus more for swirling
  • 2 tbs milk of your choice
  • A big pinch of salt! (You won’t need extra salt if your peanut butter is salted)

Directions:

  1. Blend bananas, milk, vanilla, 1/3 cup peanut butter and salt (if using) in a high speed blender until smooth.
  2. Scoop the mixture out of the blender and fill each mold about halfway.
  3. Swirl in about 1tsp of peanut butter, and a little bit more salt if it isn’t salted for that delicious sweet and salty element.
  4. Fill the molds with the remaining banana mixture.
  5. Pop in the popsicle sticks and freeze for about 2-3 hours. 
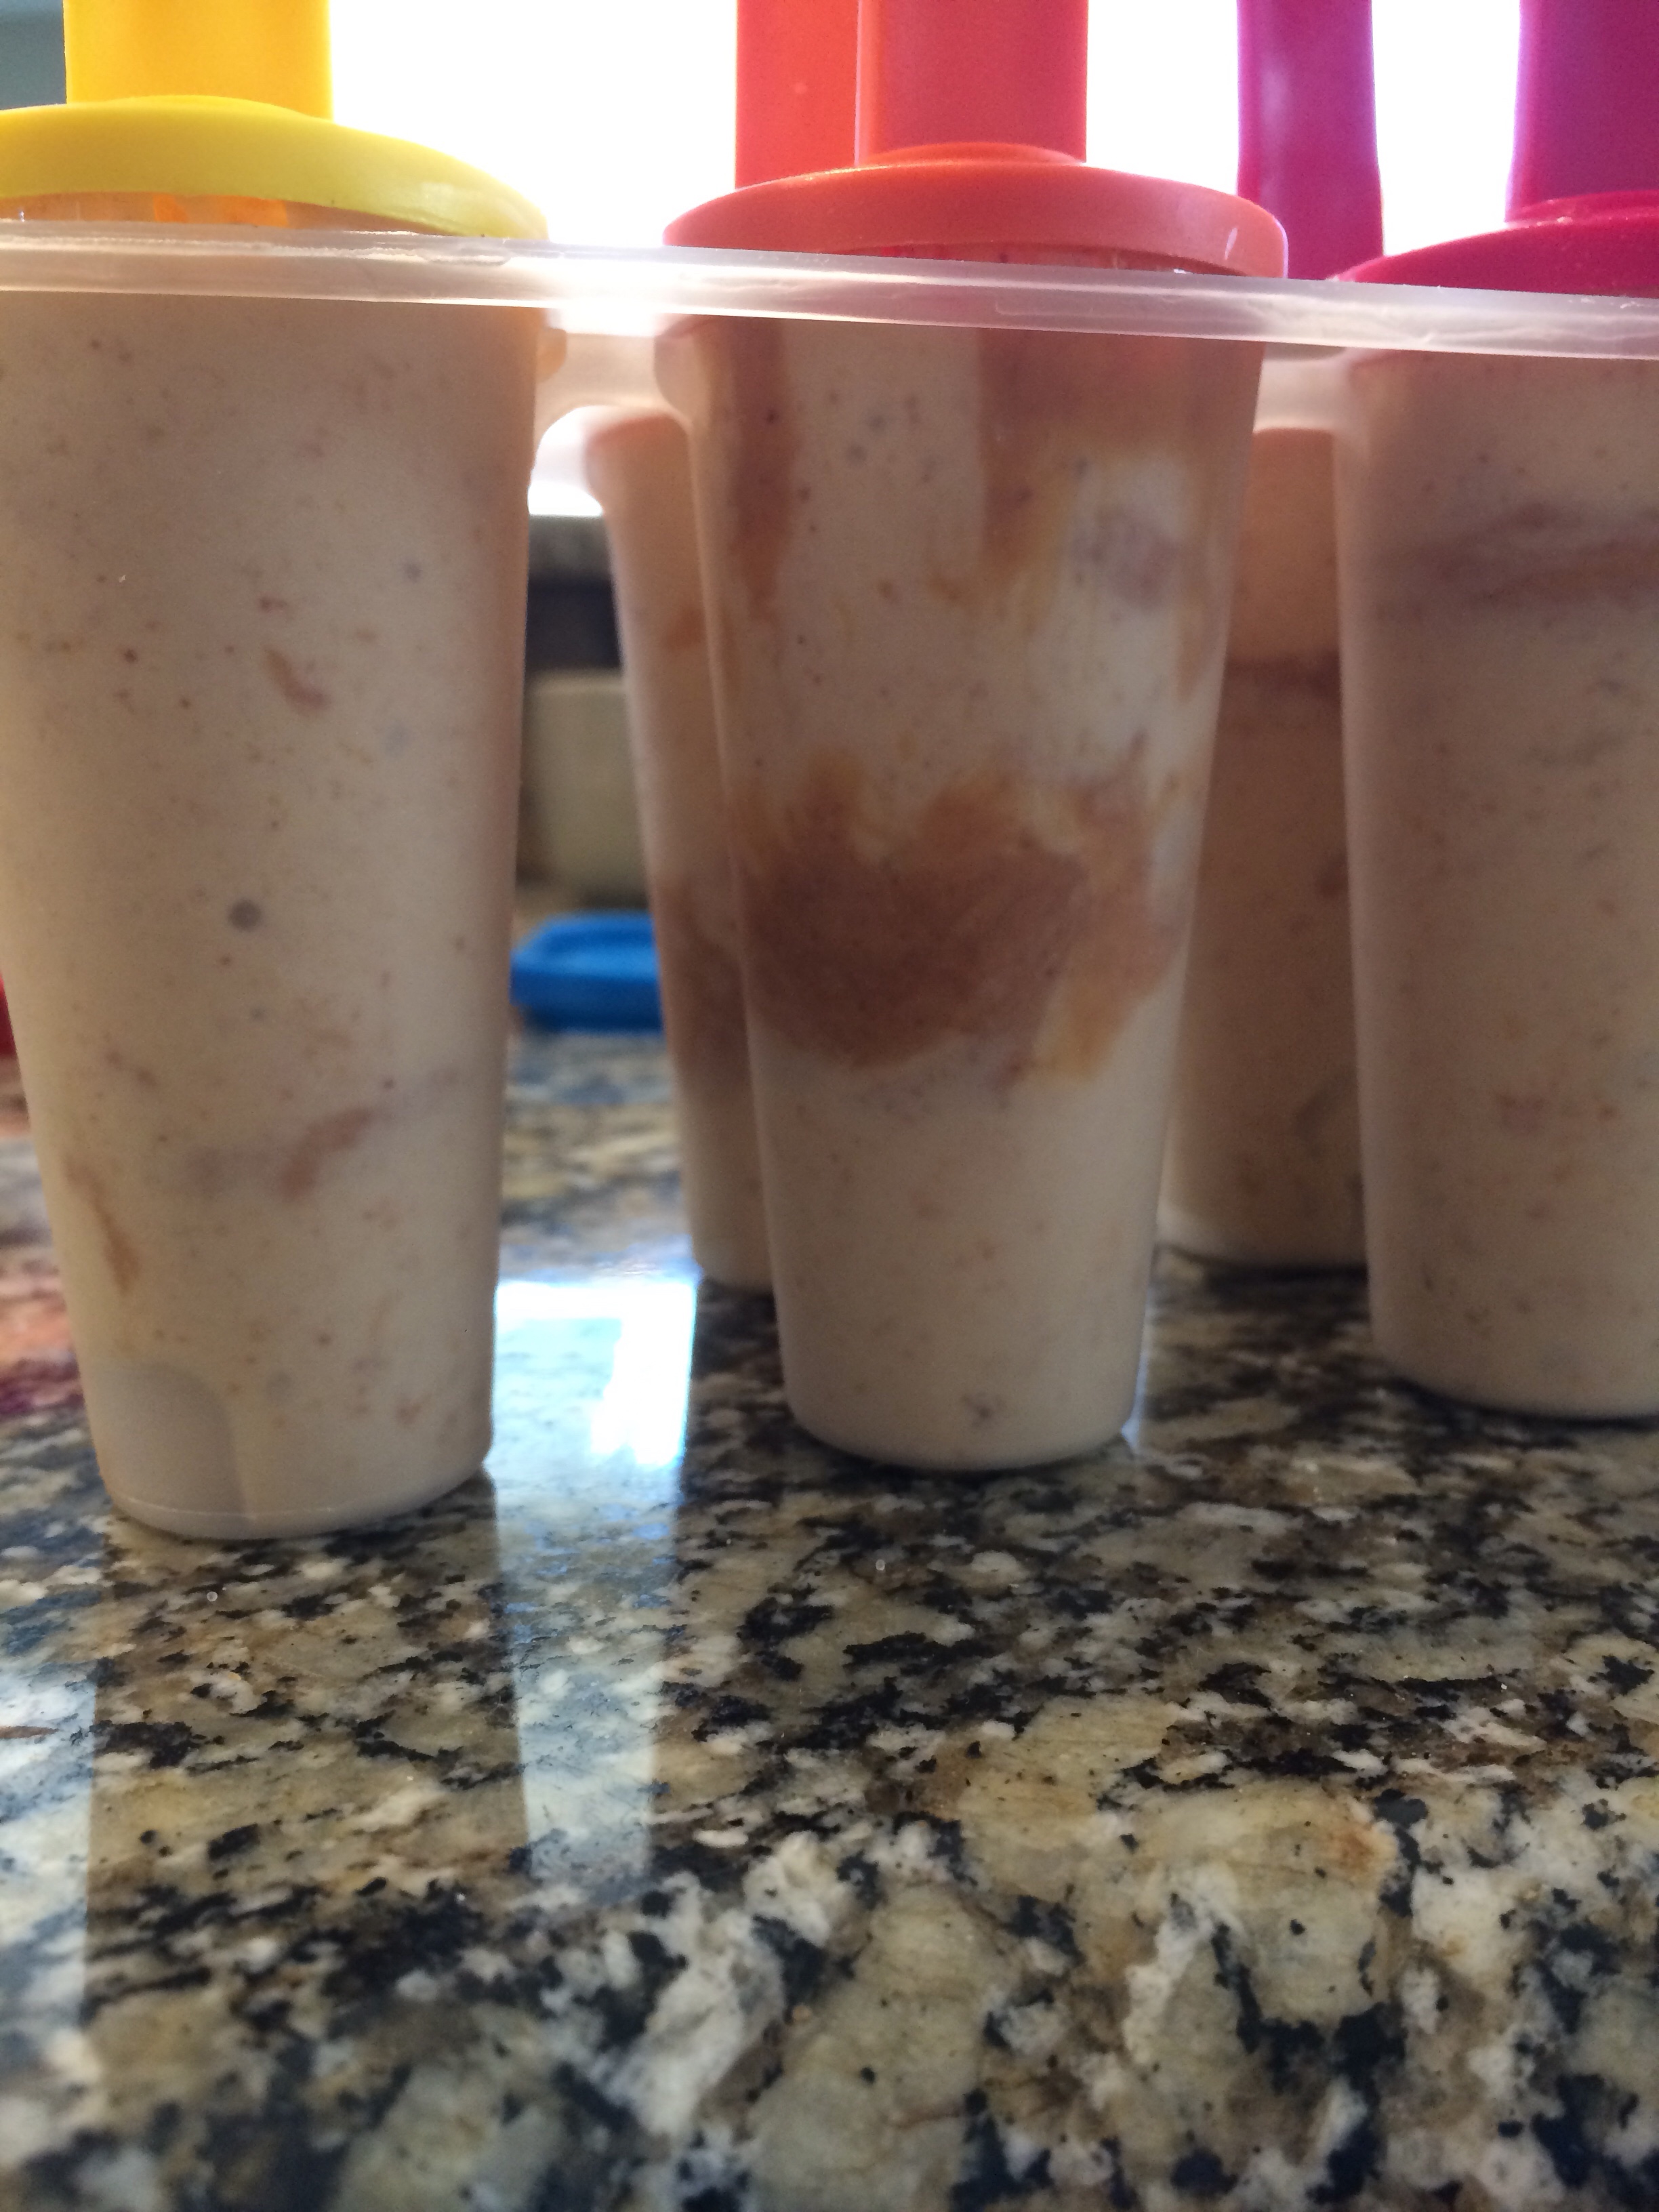
MAKE SURE THEY ARE COMPLETELY FROZEN BEFORE YOU TRY AND REMOVE THEM FROM THD MOLDS. 😉
  6. Run warm water over the molds to release the creamsicles.
  7. Enjoy!

Have fun making and eating these scrumptious creamsicles! They’re the perfect cold treat on a hot day;)

Yours Truly, MyDayIsBooked😄

Homemade Almond Butter

Hello! As you may have gathered by my new Twitter profile picture, I’m pretty obsessed with nut butter right now! That’s why I decided to make this super easy homemade almond butter. With only one ingredient, it makes a great healthy spread/dip/thing to eat right out of the container! Here’s the recipe:

Ingredients:

  • 2 cups of raw or roasted almonds


Directions:

  1. Place the almonds in a food processor or dry-blender. I’m not quite sure if a regular blender would work- I haven’t tried it, and the blades aren’t quite suited to hard stuff like nuts.
  2. Blend the almonds for 2 minute intervals, pausing to stir them around each time. You may have to use the blender-pusher thingy to make sure that the almonds on the sides get redirected into the blade path. At first, it will seem like the almonds will never become a butter, but after about 10 minutes or so, the oils are released and the butter begins to take shape. img_8759
  3. Once the butter is a butter, remove it from the blender and store in the fridge in an airtight container. The longer you blend the butter, the looser and creamier it gets.


That’s about it! Almond butter is great on toast and with fruit, basically anything that goes with peanut butter. I love it because I can’t eat almonds with my braces, so this gives me the almond flavour I love! Bye until my next post;)


Yours Truly, MyDayIsBooked


Scrumptious Sugar Free Muffins

Hello again! If you’re like me, finding healthy recipes that are simultaneously delicious can be tricky, especially when it comes to baking. I looked for a good muffin recipe for a while, but the ones I tried were either too dry, not sweet enough, or unhealthy. Finally, I stumbled across this one, and with a few tweaks I was able to bake a delicious, naturally sweet muffin! I’m not even joking when I say that these are some of the best muffins I’ve ever had, except for maybe the ones that my grandmothers make (both of them make pretty awesome muffins!). Make sure to check out my recipe down below!!

Ingredients: (Makes 9 Muffins)

  • 1 cup oat flour
  • 2 bananas
  • 1 cup oats
  • 1/2 cup honey, maple syrup or apple sauce
  • 4 tablespoons coconut oil, melted
  • 1 teaspoon baking soda
  • 1 teaspoon baking powder
  • 1 teaspoon vanilla
  • 1/2 teaspoon salt
  • 1 teaspoon cinnamon
  • 1/4 cup add ins (optional)

Directions:

  1. Preheat the oven to 400 degrees Fahrenheit.
  2. Mash the bananas in a large bowl, then add in the sweetener, oat flour and melted coconut oil. Mix until combined.
  3. Next, add in the baking soda, powder, vanilla, cinnamon and salt and stir well.
  4. Finally, mix in oats and add ins. Some ideas are blueberries, nuts, or cranberries.
  5. Place the batter in a lined muffin tin ( if you don’t have liners, you can grease each cup with more coconut oil), and bake at 400 degrees for 15-20 minutes, or until a toothpick comes out clean with a few crumbs when inserted into the middle of a muffin.
  6. Take a spoon and eat the leftover batter while waiting for them to bake;)
  7. Let cool and enjoy!

Yum!! My mouth is watering just thinking about them. Enjoy your muffins!

Yours Truly, MyDayIsBooked;)