PB Banana Creamsicles

Hi! I seriously can’t wait to share this recipe with you; I know I say this in every post, but these creamsicles are actually my favourite recipe of all time! They’re delicious, and made with some of my favourite things; you guessed it, bananas and peanut butter! I actually found this recipe on Pinterest, and would like to give a little shout-out to feedingyourbeauty.com for making my tastebuds super happy! These measurements make approximately 6-8 creamsicles, depending on how big your molds are. If you don’t have any molds, it’s all good! Freeze the creamsicle batter (do you call it batter?) as directed in my Very Berry Frozen Yogurt post. Without further ado, here’s the recipe for this creamy summer treat:

Ingredients:

  • 3 medium bananas, chopped and frozen
  • 2 tsp vanilla
  • 1/3 cup all natural peanut butter (salted and unsalted both work) plus more for swirling
  • 2 tbs milk of your choice
  • A big pinch of salt! (You won’t need extra salt if your peanut butter is salted)

Directions:

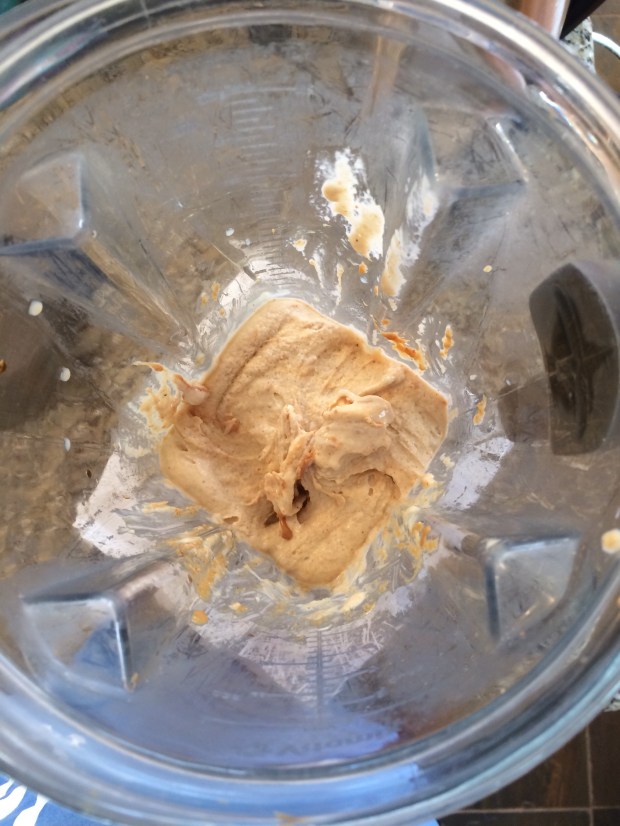
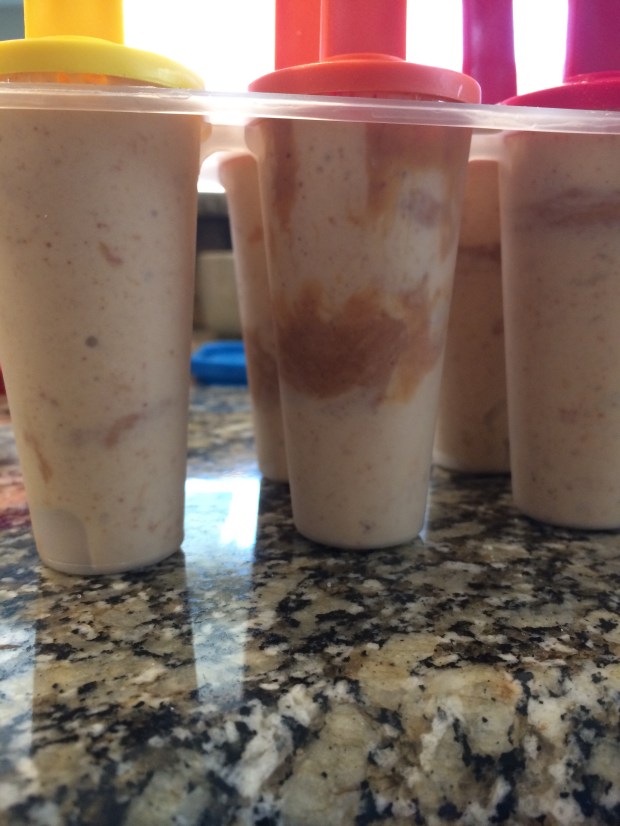
  1. Blend bananas, milk, vanilla, 1/3 cup peanut butter and salt (if using) in a high speed blender until smooth.
  2. Scoop the mixture out of the blender and fill each mold about halfway.
  3. Swirl in about 1tsp of peanut butter, and a little bit more salt if it isn’t salted for that delicious sweet and salty element.
  4. Fill the molds with the remaining banana mixture.
  5. Pop in the popsicle sticks and freeze for about 2-3 hours. MAKE SURE THEY ARE COMPLETELY FROZEN BEFORE YOU TRY AND REMOVE THEM FROM THD MOLDS. 😉
  6. Run warm water over the molds to release the creamsicles.
  7. Enjoy!

Have fun making and eating these scrumptious creamsicles! They’re the perfect cold treat on a hot day;)

Yours Truly, MyDayIsBooked😄

Roasted Chickpea Salad

Hey guys! I’m super sorry that I haven’t posted in awhile. I hope that this recipe makes up for it! I was kind of experimenting with different ideas until I came out with the final product. In the end, though, it turned out really good! Here’s the recipe.

Ingredients:

For the Chickpeas: (3 servings)

  • 1 can (19 oz) of chickpeas
  • 2 teaspoons olive or avocado oil
  • 1/2 teaspoon garlic powder
  • 1/2 teaspoon onion powder
  • 1 teaspoon salt
  • 1/4 teaspoon pepper

For the Salad: (1serving)

  • 1 small tomato
  • 2 cups spring mix
  • 1 sprig of chives
  • 1/2 a bell pepper
  • 1/2 a cucumber

For the Dressing: (1 serving)

  • 1 1/2 tablespoons Greek Yogurt
  • 1 teaspoon parsley
  • 1 teaspoon Apple cider vinegar
  • 1 1/2 tablespoons lemon juice

Directions:

  1. Preheat your oven to 425 degrees Fahrenheit. Drain and rinse the chickpeas, then put into a bowl and pat dry with a paper towel. Add the oil, salt, pepper and garlic and onion powder and stir to combine.
  2. Dump the peas onto a greased baking sheet and bake for 15-20 minutes, until they’re crunchy.
  3. Chop the tomato, cucumber, chives and peppers and place into a bowl with the spring mix.
  4. Mix all of the dressing ingredients together in a bowl.
  5. Finally, put some chickpeas in top of the salad and top it off with the dressing.

I hope you enjoy this salad! The chickpeas can also be enjoyed alone for a healthy snack. See you Wednesday!;)

Yours Truly, MyDayIsBooked

Very Berry Frozen Yogurt

Hey peoples! Happy Wednesday! We’re halfway through the week-you can do it! I’m always looking for healthy treats, and I found this Frozen Yogurt on Pinterest a little while ago. There’s no added sugar or other unwanted additives with names so long that you can’t pronounce ( I would name a few but I don’t think that I can spell any of them right), and also tastes delicious! Thanks to Gimme Delicious at gimmedelicious.com for this recipe!

Ingredients:

  • 2 cups frozen berries
  • 1/2 cup Vanilla or Plain Greek Yogurt
  • 1-2 Tablespoons of Honey
  • Dash of vanilla
  • A bit of lemon juice (optional)

Directions:

  1. Put all ingredients into a blender.
  2. Blend until smooth.
  3. Eat is straight from the blender, or put it in the freezer for a bit for a harder alternative.
  4. That’s it!

So simple and so delicious! I haven’t tried it with different frozen fruits, but I’m sure it would work just as well. Let me know if you’ve tried any!

Yours Truly, MyDayIsBooked

Quinoa Salad

This Quinoa Salad is great for school lunches if you make it the night before! It’s bright, flavourful,  and bursting with veggies. For protein, you can add in any kind of meat that you want! best of all, it’s super easy. So, before you start drooling all over your screen, let me get into the recipe.;))

Ingredients:

  • 1/4 cup quinoa
  • 1/2 cup diced cucumber
  • 1/2 cup diced peppers
  • 1 sprig of green onion
  • 1 teaspoon dill
  • 1 teaspoon parsley
  • 1 teaspoon cilantro
  • The juice of 1/2 a lemon
  • Protein of your choice


Directions:

Follow the cooking instructions on the package of your quinoa. Once you’re done, it should look something like this:

IMG_8272

Looks super appetizing, right? Don’t worry, once you add all of the veggies and herbs, it looks way better. While the quinoa is cooling down, dice your pepper, cucumber and green onion into mid-sized pieces and cut your lemon in half, like this:

IMG_8270

Now take your quinoa and add the cilantro, dill, and parsley to it, followed by the veggies. Finally, squeeze the lemon juice into the salad. Store this in a container in the fridge and enjoy it for lunch the next day!

IMG_8274

As for protein, you can really add anything you want. I usually put hemp seeds in mine, but chicken would go great as well.

I hope that you like this recipe! Make sure that you let me know what you think of it in the comments section! See you tomorrow for Day 10 of 12 Days of Awesome Ways to Be Healthier.;))

Yours Truly, MyDayIsBooked