MERRY CHRISTMAS!!!! Hope you’re all having an amazing day so far! I know this Christmas looks a little different than past years, but hopefully you guys can find some way to hang out with family, whether it be virtually or with a small, socially distant group in person.
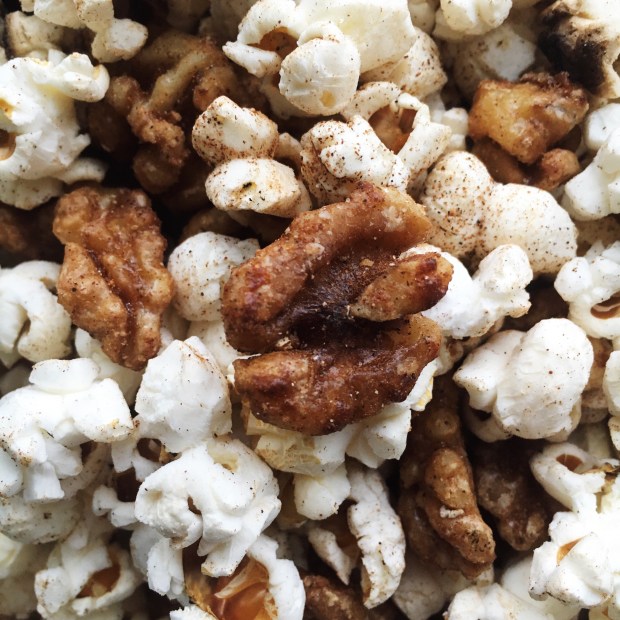
For a fun and festive Christmas recipe, I thought I’d share a delicious popcorn mix! It’s a quick and easy recipe that you can whip up while celebrating the holiday. The walnuts are beautifully candied in some maple syrup on the stove, making them tender and sweet, balancing perfectly with the salted popcorn! I also threw some cinnamon in there for some extra Christmas flavour.
Also, we’re making our popcorn from scratch! Of course, you can use pre-made popcorn if you want to speed things up even more, but making your own is surprisingly easy and healthier. You’ve just got to heat up the oil, toss in the kernels, and listen to them pop! Plus you can season to your own taste with salt.
I’m going to keep this post short today so you can get straight to the recipe and go back to making holiday memories! I hope you enjoy this recipe and have a great rest of your day:)
Candied Walnut Popcorn
Serves: 4
Total Time: 20 minutes
Ingredients:
2 tbsp coconut oil
1/3 cup popcorn kernels
1 1/2 cups walnuts
2 tbsp maple syrup
1/2 tsp cinnamon + more to taste
Salt to taste
Directions:
Heat the coconut oil in a large pot over medium-low heat.
Add in the popcorn kernels to the pot, and put on the lid, leaving it slightly ajar so that the steam can escape. Listen to the kernels pop! When the popping slows, remove the pot from the heat.
Season the popcorn to taste with salt.
In a small pot, combine the walnuts and maple syrup. Put the pot on the stove over medium-low heat, and wait for the maple syrup to come to a slight simmer. Keep stirring the walnuts and maple until the maple syrup begins to caramelize and turns into a sticky coating on the walnuts, about 3-5 minutes.
Take the pot off of the heat and let the candied walnuts cool for about 2 minutes before adding them to the popcorn. Mix everything up and season to taste with some more salt and cinnamon.
Enjoy!!
Merry Christmas and I’ll see you soon with my 2021 Bullet Journal Set-Up! I’m so excited:))
Hey guys! I’m so excited because it’s Christmas Eve tomorrow!! And so to celebrate Christmas Eve Eve, we’ve got to have some more cookies! If you thought I could let a holiday season go by without making any sort of peanut butter recipe, then you would be mistaken. Peanut butter is still one of my favourite things on the planet, and so I had to make a delicious cookie using it!
I was inspired by the Kraft peanut butter cookie recipe, which I make a lot for my family. It’s super simple, using only peanut butter, sugar, and an egg, but I wanted to make it a bit healthier, and also add a super fun and delicious surprise inside! So I started by mixing together some oat flour, natural peanut butter, an egg, and some maple syrup. Natural peanut butter is one of my best discoveries over the past few years- you get all of the pure, peanut flavour without any added hydrogenated oils, sugar, or maltodextrin! If you haven’t already, make the switch because it’s definitely worth it:) Oat flour is another thing that’s great to have on hand; it’s just ground up oats. I keep a little bit in a small bag so it’s ready to use in speedy recipes like this!
Mixed up together, the ingredients make a nice dough that is easily rolled up into balls. This is where the surprise comes in! I stuck a frozen blueberry in each dough ball and then covered it with dough, flattening the whole thing a bit with my hand. The blueberry gets nice and melty and gooey in the oven, making for a super tasty centre and sort of a peanut butter and jam combo. The cookie itself is delicious as well! And they only bake for about 15 minutes, so they’re the perfect last-minute Christmas treat, either for Christmas day, or maybe after all the business is over and you want to relax with a peanut-buttery snack.
Enjoy these simple and tasty cookies!!:)
Peanut Butter Surprise Cookies
Serves: Makes 9 Cookies
Total Time: 30 minutes
Ingredients:
1/3 cup creamy, unsalted natural peanut butter
2/3 cup oat flour
3 tbsp maple syrup
1 egg
9 frozen blueberries
Directions:
Preheat your oven to 350 degrees Fahrenheit.
Mix together the peanut butter, oat flour, maple syrup and egg in a medium sized bowl.
Take a tablespoon sized amount of dough and roll it into a ball. Place a frozen blueberry in the centre, then roll again so that the blueberry is completely covered by dough. Put the ball of dough on a parchment lined baking sheet, and flatten slightly using your fingers. Repeat until you have 9 cookies on the sheet.
Bake the cookies for 15-18 minutes, until golden brown on the bottom.
Cool completely and enjoy!
Have an amazing Christmas everybody! I’ll have a recipe coming oat on Christmas Day so make sure you check it out if you want a fun snack to make with your family. I hope you all spend time with loved ones and have a great holiday:))
‘Sup guys! I’ve done a lot of sweet Christmas recipes so far, but today I have some Smoky Roasted Cauliflower Steaks that are a GREAT vegetarian main or side dish for your Christmas dinner. I also threw some mushrooms on the pan to toast with the steaks because mushrooms are so tasty and remind me of the holidays!
The concept of a cauliflower steak is a thick slab of cauliflower seared or roasted so that it is reminiscent of a steak. I actually love steaks- I’m not vegan or vegetarian, but I love veggies too, and these “steaks” are just so good and perfect for switching it up once and a while.
In this recipe, I amped up the meatiness of the cauliflower by using liquid smoke in the marinade!! My family and I made some homemade beef jerky the other week (it was so good I highly recommend), and an ingredient in the marinade was liquid smoke. It gave it such a good flavour! So I thought, why not add it to my cauliflower? And it worked its magic there too. Liquid smoke is used in a variety of vegan and vegetarian recipes because it does give that savoury, meaty flavour, so it’s worth picking some up. Also in the marinade, we have balsamic, garlic, and a bunch of spices that all work together to create a ziploc bag full of deliciousness😂
I marinaded the steaks for 4 hours- flipping the bag halfway through to make sure that everything got coated evenly. This made the cauliflower so flavourful! I then placed the steaks on a sheet pan in the oven, but not before tossing some sliced mushrooms in the leftover marinade and throwing them on the pan as well.
Everything roasts up SO nicely in the oven, getting crispy and tender and steak-like! These steaks, along with the mushrooms, would be great alongside some mashed potatoes (or sweet potatoes), more roasted veggies, and maybe some vegetable gravy! They’re super tasty and have a wonderful texture.
Hope you enjoy this vegan holiday dish!
Smoky Roasted Cauliflower Steaks
Serves: 3
Total Time: 5 hours
Ingredients:
For the Steaks and Mushrooms:
1/2 a head of cauliflower, washed and cut lengthwise into about 3/4 inch slabs
5-6 white mushrooms, sliced
Sprinkle of dried oregano and dried rosemary
Salt and pepper to taste
For the Marinade:
1/4 cup balsamic vinegar
1/2 tsp maple syrup
1/4 tsp liquid smoke
1/2 tsp salt
1 tsp garlic powder
1/2 tsp paprika
1/4 tsp ground pepper
Red chilli flakes to taste
Directions:
Combine all of the marinade ingredients in a large resealable bag. Add in the cauliflower steaks and place in the fridge for 4 hours, flipping over the bag halfway through to make sure that the marinade gets to every part of the veggies.
Once the 4 hours are up, preheat your oven to 400 degrees Fahrenheit. Remove the steaks from the marinade and place them on a parchment lined baking sheet.
Toss the sliced mushrooms in the remaining marinade, and then place them on the baking sheet as well. Sprinkle some dried rosemary, oregano, salt and pepper over everything, throw the pan in the oven and roast for 35-40 minutes, until the cauliflower is tender.
Remove the pan from the oven and serves the mushrooms and cauliflower warm.
Enjoy!
Hope you’re all having a wonderful Christmas-week so far! I’ll see you on Wednesday with another holiday recipe🥰
Hey guys! I’m so excited to announce my first ever giveaway!!
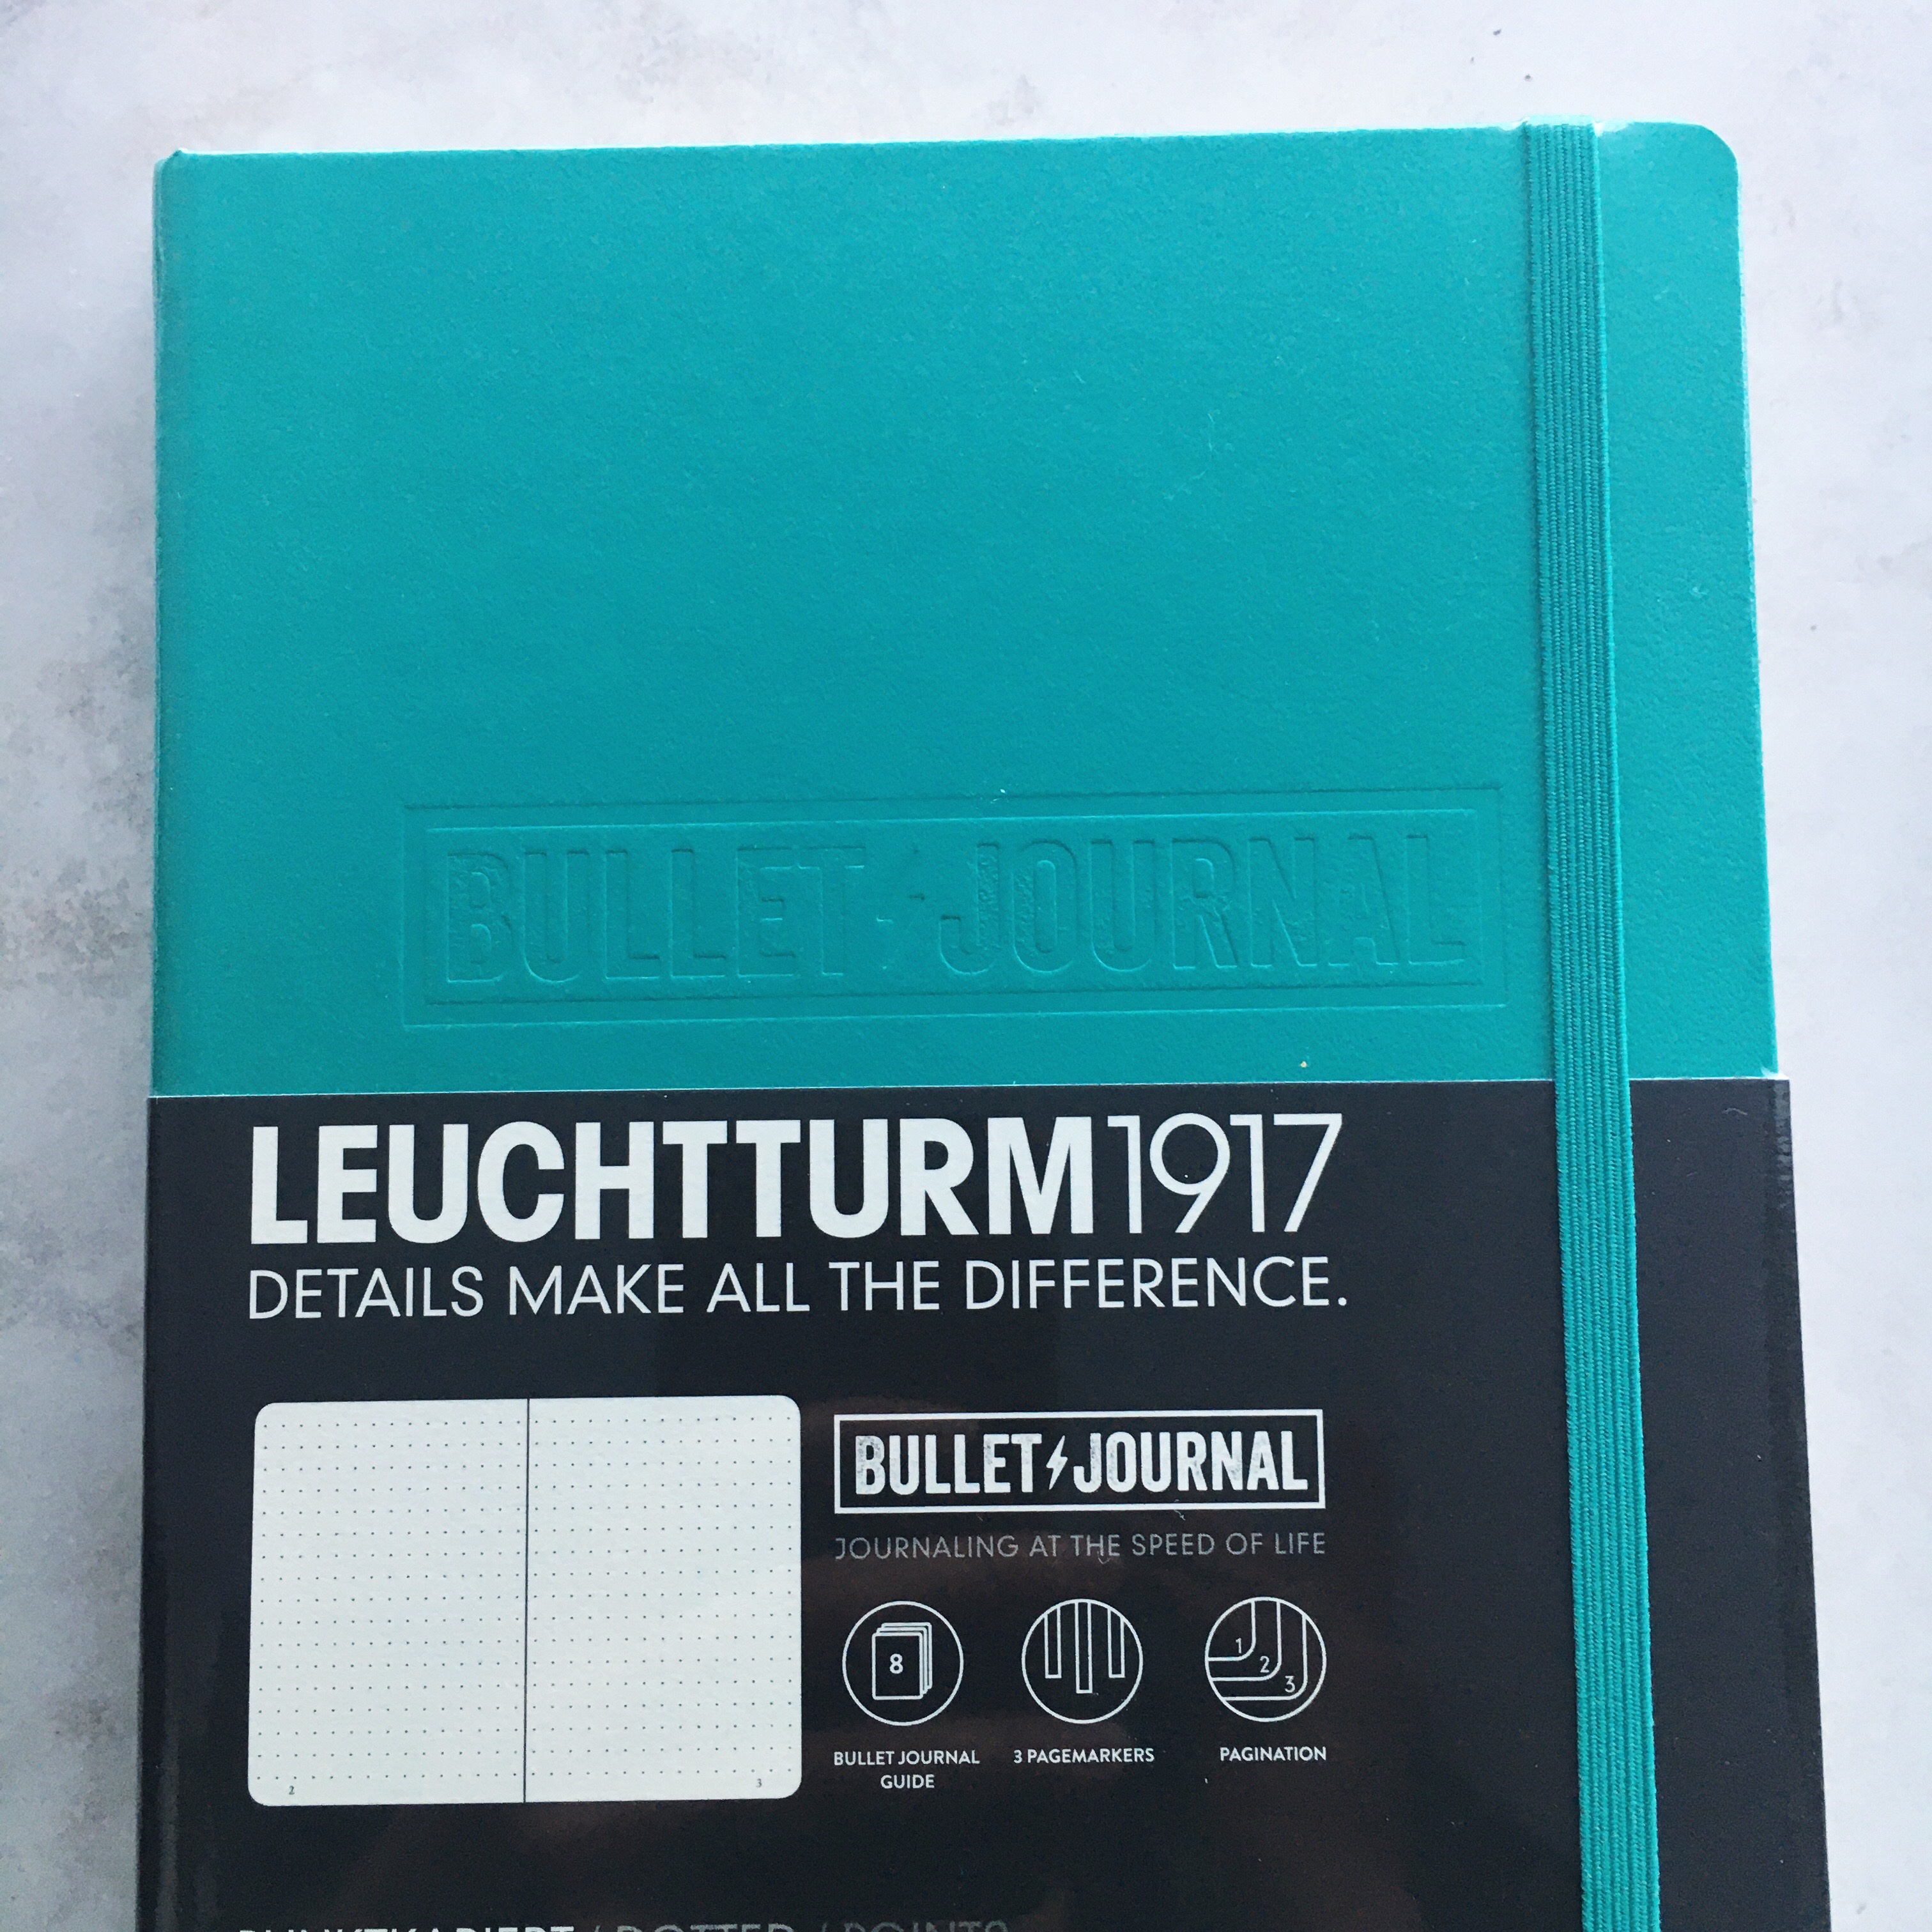
Leuchtturm 1917 Canada very kindly sent me one of their beautiful journals to giveaway to you guys! I’ve been using a Leuchtturm 1917 journal for the past two years now, and the journal that I’m planning to use next year is a Leuchtturm as well. I love them so much because of the quality and all of the features that they have. Their dotted notebooks have a pre-made table of contents, an elastic band for closure, numbered pages, and a super handy back pocket! They’re also one of the only journals that I can find with over 200 pages, which I need because I like having just one journal for the whole year.
The specific journal that I’m giving away is a gorgeous emerald colour and was a collaboration with the founder or the Bullet Journal system, so it has BULLET JOURNAL embossed on the front and comes with a bullet journaling guide! It’s absolutely amazing and great for both a first time and veteran journaler.
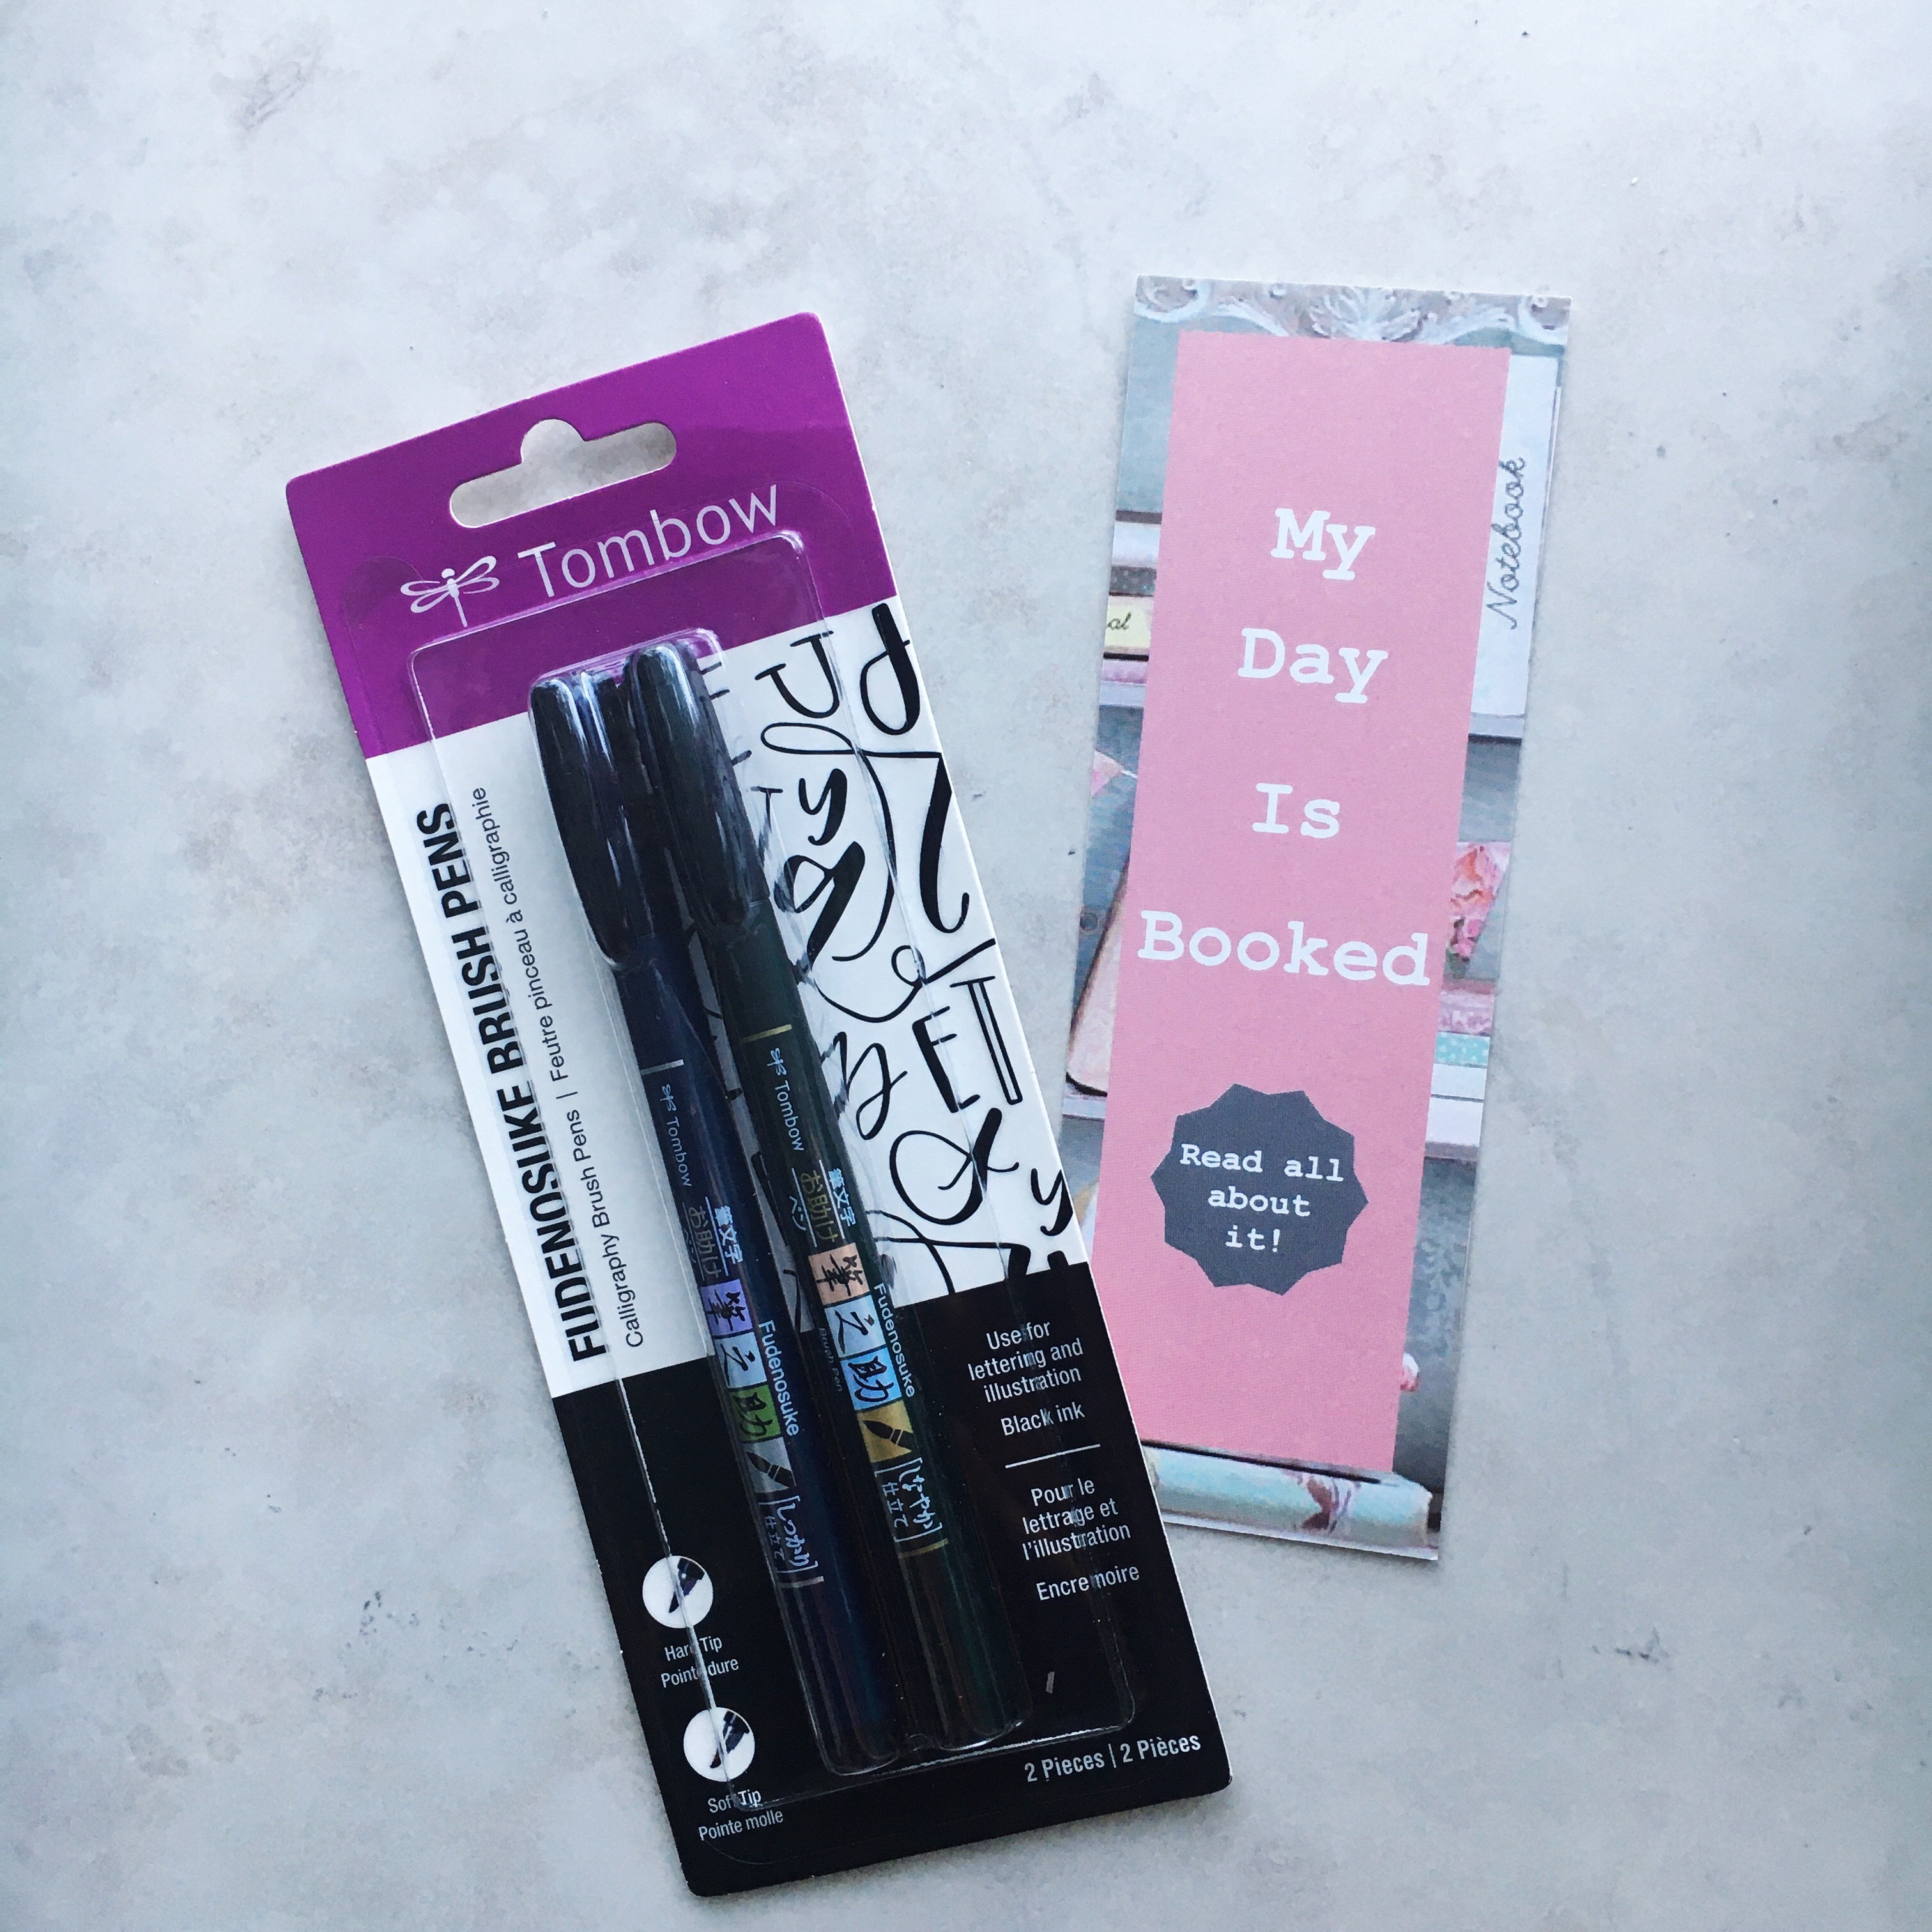
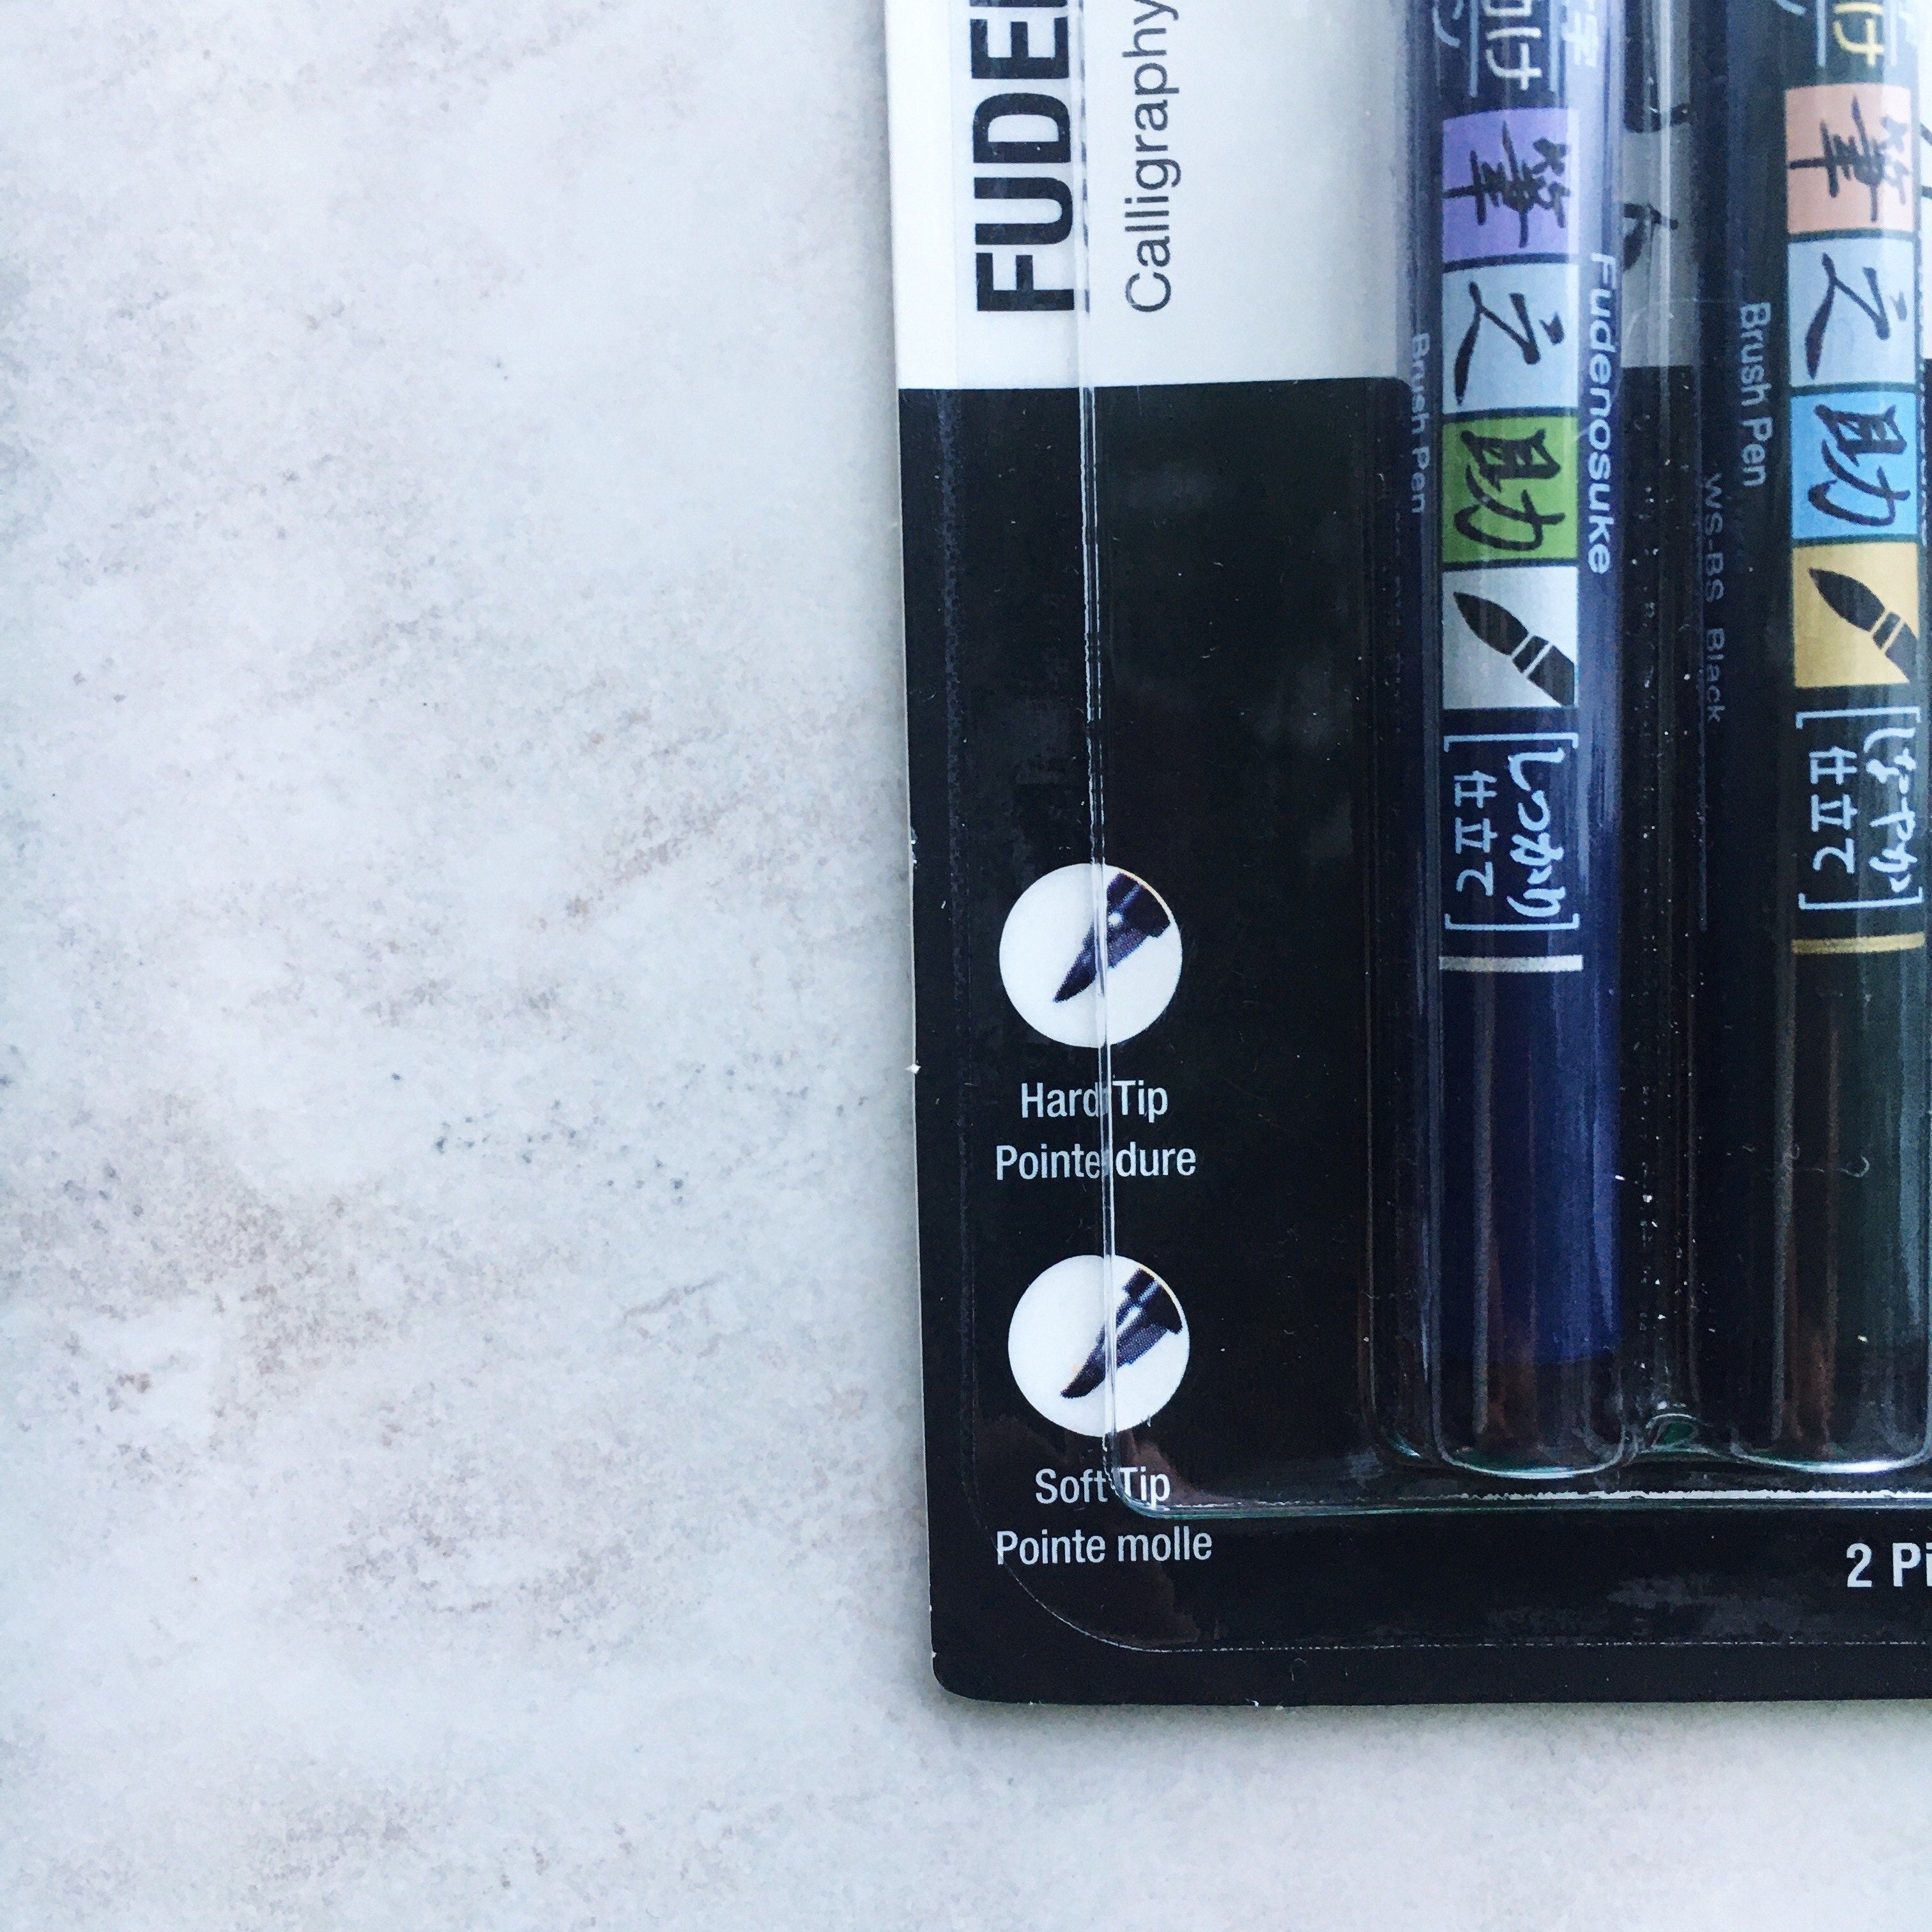
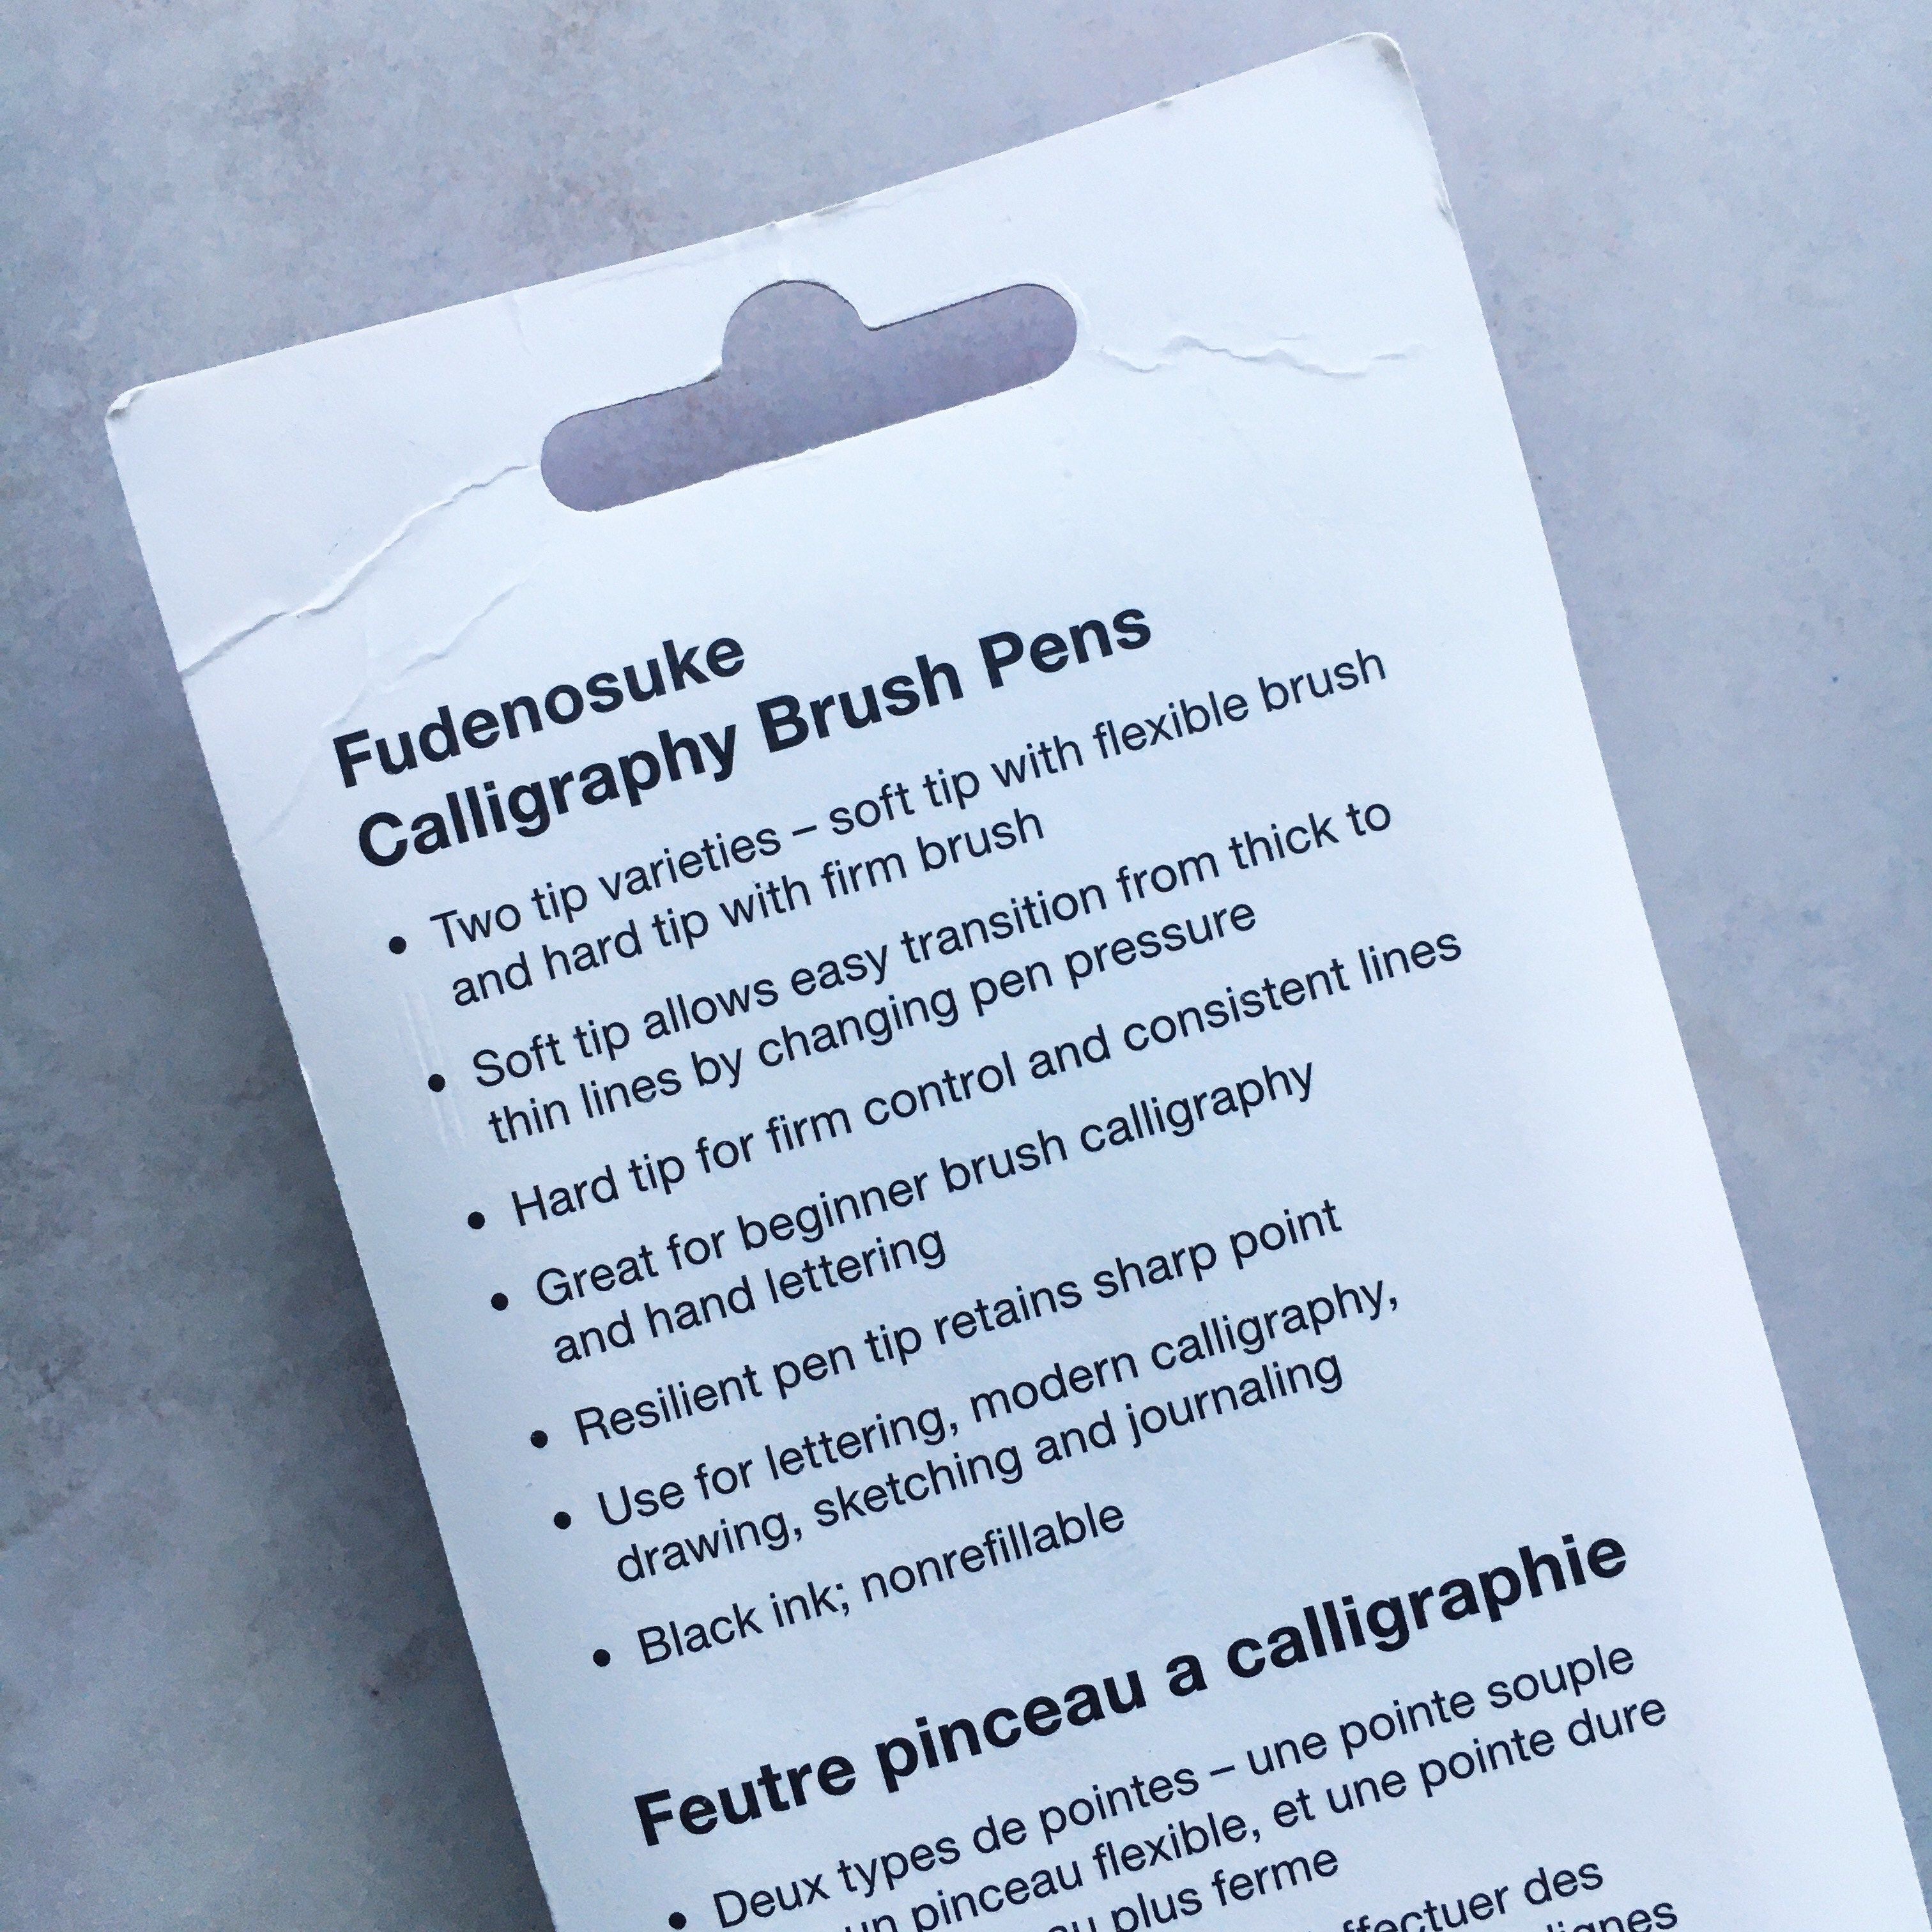
I’m also including a set of Tombow Fudenoske Brush Pens (these were not sent to me by Tombow), which are my favourite pens to use in my journal, as well as a MyDayIsBooked bookmark, and some super cute washi tapes! So this is perfect if you’re looking to start your first bullet journal this year!
This giveaway will be taking place on Instagram, so make sure that you check out my Instagram page for all of the rules and instructions on how to enter!
Moving on with my post… I wanted to look back on some of my favourite spreads from 2020! I did such a range of styles this past year, and I love to see the progression that I make with my writing, doodles, and different spreads that work for me at different times. Also something that struck me when looking through these was how my photography evolved- I really want to scream at my January 2020 self for having sucky lighting and not showing my journal off to it’s full potential! I kept the same photos in here from when I actually made the spreads, so that picture-taking journey is on display here as well.
I love that I found out a lot about what I absolutely need to have in a journal this year. That’s what’s so great about bullet journaling as opposed to having a pre-made planner; you can totally customize everything, and all of your essentials are in one place! If you haven’t already, defintely experiment with different spreads. The only way to find what is the best for you is if you go a little out of your comfort zone!
Here are some of my favourite spreads from 2020:))
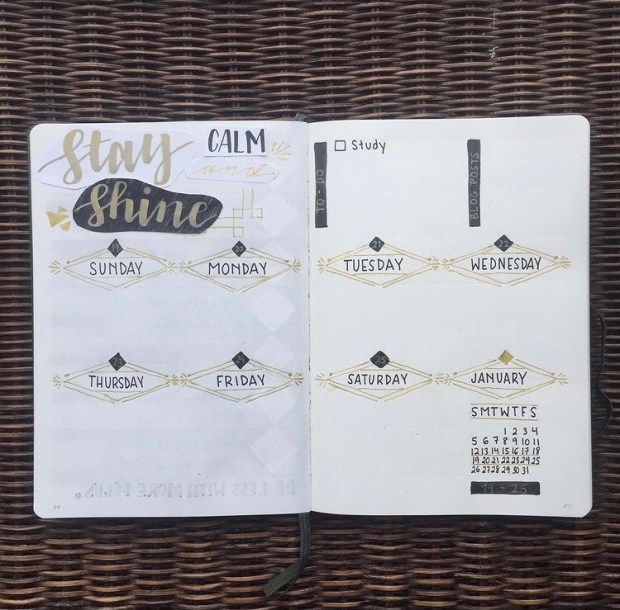
This is my favourite weekly spread from January! This is the month where I did sort of a 1920’s art deco theme, which was a kind of style that I’d never really done before. I love the combo of the gold and black, and how much space I had to plan in this spread. I’ve realized that planning space is a number one priority for me! I also love how the quote came together at the top- I glued in some pieces of paper here for a more scrap-booky look.
I just LOVE this February title page. It’s so simple and clean yet so elegant! I want to do more things like this in my 2021 journal because I feel like I’ve been going a little heavy on the detail and the drawing lately. I love the quote, cute borders, and colours on this page. Plus my calligraphy is pretty good:)
March was a fun month! In my journal at least; I know that March was the time when we really got hit with COVID stuff. This was the first time that I went with this more graphical tracker, and I actually stuck with this style for the rest of the year. I love the way that the plants are coming out of the side! On the left side of the spread I did some really nice habit trackers as well. I’m not a huge fan of that style of tracker functionality wise, but I like the way that it looks.
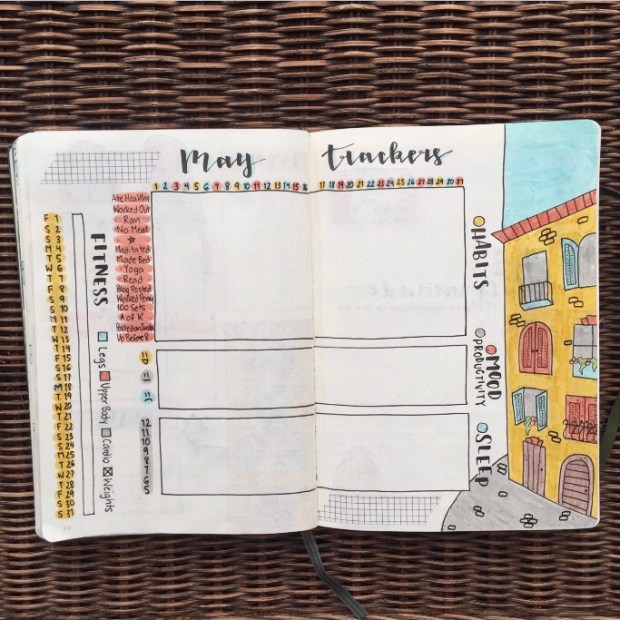
May was one of my favourite themes this year, and this is definitely one of my favourite tracker spreads of all time. Just the way that everything looks together, from the illustration to the boxes to the font, is so good! It’s the first time I tried this layout and I absolutely love it; I stuck with it for the remaining seven months of the year. So yeah, totally in love!
Here’s another spread from May because I just love it so so much. My font and the design of the page for my gratitude log just stands out so nicely! And on the opposite page I did a Crash Course episode tracker. The logo turned out really well:))
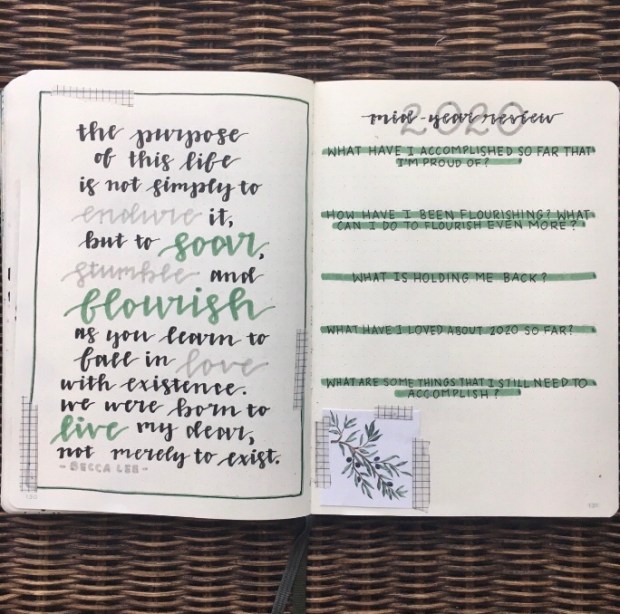
This spread was great for some mid-year reflection! My quote is so pretty and it’s a really meaningful one too. It went hand in hand with my word for this year, which was flourish. I kind of fell off the track of writing about my thoughts and feeling, which is something that I want to do more of in 2021 because it helps me assess where I’m at and what I need to be doing better.
This is another candidate for my favourite tracker spread!! The drawings are so cute, and I love how the colours go in and out of the black border. Again, just something about how this spread looks just makes me happy! Anne of Green Gables was such a great theme.
August had such a pretty title page! The colours worked so nicely together, and I was totally getting Mediterranean tile vibes. I love the patterns and how simple yet beautiful it is! My quote for this month was really inspirational too- all about giving 110%.
October was a lot of fun to do because of the contrast between the black and white! Something cool that I included this month was a moon journal, where I did some reflection based on different phases of the moon. It was a really unique and interesting spread! I love incorporating pages like this because it breaks up the repetition of having the same spreads over and over.
This full-page title page is gorgeous! It’s so nostalgic for me because I love watching The Sound of Music every year. It was really drawing heavy, so I kind of want to do some simpler spreads soon, but I do love the way that it turned out!
My Advent calendar spread is so cute, and was inspired by the song “My Favourite Things”. In each pocket there’s a little self-care task or act of kindness to complete. I’ll be honest, I haven’t been the best at keeping up with this! But I still love all of the doodles and how I wrote out the lyrics at the top.
Those were my favourite spreads from the past year! I’ll see you guys tomorrow with a delicious recipe! In the meantime, don’t forget to check out my Instagram page and enter my giveaway!
Hey guys! There’s only a week until Christmas time and I’m so ready! I’ve been thinking about how I’m going to wrap my gifts and make them all pretty and it just brings me joy. And you know what else brings me joy? These Chocolate Tahini Snowballs!! They’re super cute and are a great addition to your spread of holiday baking.
I think that bite-sized desserts are honestly the best, because how else are you going to sample all those delicious holiday treats? These Snowballs are the perfect size and are absolutely stunning. They’re rolled in coconut just before baking to give that snowball effect, but the coconut adds so much to the flavour and texture as well. So yum! When you pick up these snowballs, they feel pretty hefty, and so it seems like they’re going to be dense and dry. But when you bite into them you get a warm, fudgy inside that is to die for! The tahini gives such a nice rich and nutty flavour, contrasting the chocolate perfectly. And these little bundles of joy deliver all this while being vegan, oil free, and refined sugar free!
I love how simple these are to make too:)) I started by mixing all of the ingredients together in a big bowl, and then rolling out little balls, covering them with coconut, and baking them for just fifteen minutes!! The recipe can easily be doubled if you want double the chocolate-y deliciousness, and why wouldn’t you? So yeah, these are amazing if you need a festive recipe in a pinch, or are just looking for a quick and healthy dessert to satisfy your sweet tooth. They would be great next to some of my Ginger Oat Cookies– just sayin.
I hop you enjoy these bite-sized holiday treats! They’re so fun to make and to eat:))
Chocolate Tahini Snowballs
Serves: Makes about 10 Snowballs
Total Time: 25 minutes
Ingredients:
1/2 cup oat flour (blended oats)
1/2 cup rolled oats
1/3 cup cocoa powder (I used organic)
1/4 cup tahini
3 tbsp maple syrup
1 tsp vanilla extract
2 tbsp almond milk
1/4 cup unsweetened desiccated coconut
Directions:
Preheat your oven to 350 degrees Fahrenheit.
Mix all of the ingredients, except for the coconut, together in a large bowl.
Scoop out tablespoon fulls of the mixture and roll into balls using your hands.
Dump the coconut onto a small plate, and roll the balls around in it until they are completely covered.
Place the snowballs on a parchment lined baking sheet and bake for 15 minutes.
Remove from the oven, let cool and enjoy!!
Make sure you come back for more delicious holiday recipes next week!!!