Avocado Tuna Salad Wrap

Hello! I’ve been super busy and haven’t been able to post in a while, but I can’t wait to share this delicious lunch recipe with you! I literally had a chicken salad sandwich for lunch every day last week, so I was craving something a little different, and tuna was the perfect option! Plus, using avocado instead of mayo makes it healthier and more delicious. Scroll down for the recipe!

Makes 1-2 servings (depending on how hungry you are!)

Ingredients:

  • 1 can of chunk tuna, drained
  • 1/4 white onion, finely chopped
  • 1 wrap (preferably whole wheat)
  • Half of an avocado
  • A few spinach leaves
  • About 1/4 of a cucumber, julienned
  • Salt and pepper to taste

Directions:

  1. Mash the avocado and mix in the tuna and onion, then season to taste with salt and pepper.
  2. Open the wrap and lay down some spinach leaves.
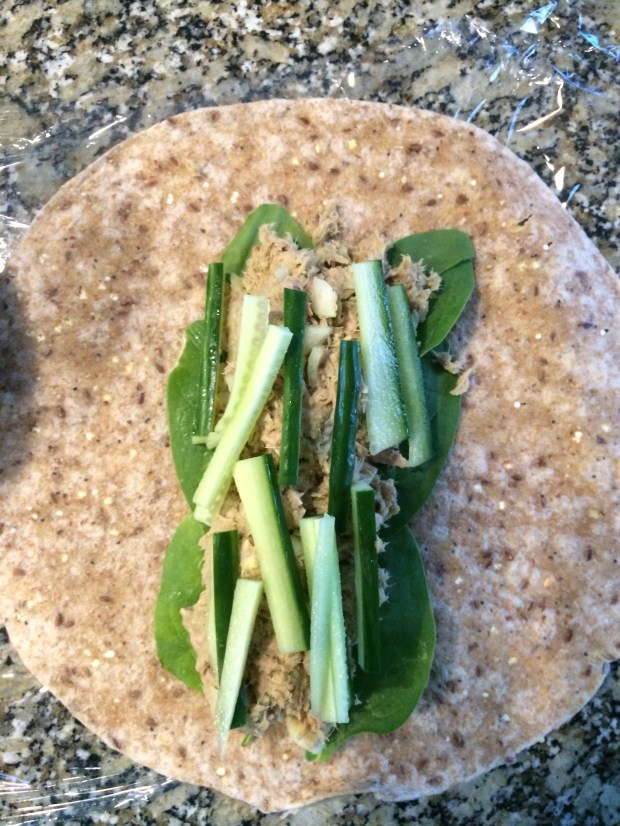
  3. Next, fill the wrap with the tuna mixture and the cucumbers. Make sure to put another layer of spinach over the cucumbers so that the wrap doesn’t get soggy.

Wrap up the wrap and you’re done!

This wrap is a great alternative to sandwiches (especially when you’ve been having the same one for a week straight!). It’s also super easy to make; you can do it before school in the morning. I hope that you enjoy them as much as I did!

Your truly, MyDayIsBooked;))

Roasted Veggie Quinoa Bowls

‘Sup guys! Today I’m posting a simple solution to hectic mornings- Roasted Veggie Quinoa Bowls! They’re delicious, healthy and easy to make the night before so you can catch a few more minutes of sleep;) Plus, there’s so many different combos of veggies that you can make them your own.

Ingredients:

  • Different kinds of veggies of your choice; ex. Cauliflower, chickpeas (I know that chickpeas are legumes but whatever, they work and I’m addicted to them), peppers, onions, carrots, zucchini, broccoli, etc.
  • Olive/Avocado oil (1 1/2 tsp per cup of veggies)
  • Salt
  • Pepper
  • Garlic powder (optional)

Directions:

  1. Preheat your oven to 400 degrees Fahrenheit
  2. Cut your veggies into manageably sized pieces, like the picture above. Place them on  a parchment lined baking sheet.
  3. Put the appropriate amount of oil on the veggies and toss until coated. I used too much oil when I did this and ended up having to wipe a bunch off, so make sure you use a measuring spoon! I would’ve used about 2 teaspoons for the cauliflower, 1 1/2 for the peppers and 1 for everything else based on the photo above.
  4. Once your veggies are tossed in oil, sprinkle with a bit of salt, pepper and garlic powder if you’re using it. I wouldn’t go too crazy with spices, because this recipe is supposed to be very versatile so you can pair it with different sauces.
  5. Put the sheet in the 400 degree oven for about 15-20 minutes, but keep an eye on the veggies. You want them to be soft, but still have a bit of bite to them.
  6. Once the veggies are done, cool and store in an airtight container in the fridge. Serve over quinoa by itself or with one of the following sauces:


Soy, garlic and honey:

Mix together 2 tbs soy sauce, 1 clove of garlic, and 1/2 tsp honey.


Tzatziki:

Mix 1/4 cup greek yogurt, 1 clove of garlic, 1 tbs lemon juice, and 1 tsp dill.


There you go:) Meal prep made healthy, easy, and delicious! Comment if you’ve found a delicious veggie combo or another sauce that works great with these bowls.


Yours Truly, MyDayIsBooked;)


Scrumptious Sugar Free Muffins

Hello again! If you’re like me, finding healthy recipes that are simultaneously delicious can be tricky, especially when it comes to baking. I looked for a good muffin recipe for a while, but the ones I tried were either too dry, not sweet enough, or unhealthy. Finally, I stumbled across this one, and with a few tweaks I was able to bake a delicious, naturally sweet muffin! I’m not even joking when I say that these are some of the best muffins I’ve ever had, except for maybe the ones that my grandmothers make (both of them make pretty awesome muffins!). Make sure to check out my recipe down below!!

Ingredients: (Makes 9 Muffins)

  • 1 cup oat flour
  • 2 bananas
  • 1 cup oats
  • 1/2 cup honey, maple syrup or apple sauce
  • 4 tablespoons coconut oil, melted
  • 1 teaspoon baking soda
  • 1 teaspoon baking powder
  • 1 teaspoon vanilla
  • 1/2 teaspoon salt
  • 1 teaspoon cinnamon
  • 1/4 cup add ins (optional)

Directions:

  1. Preheat the oven to 400 degrees Fahrenheit.
  2. Mash the bananas in a large bowl, then add in the sweetener, oat flour and melted coconut oil. Mix until combined.
  3. Next, add in the baking soda, powder, vanilla, cinnamon and salt and stir well.
  4. Finally, mix in oats and add ins. Some ideas are blueberries, nuts, or cranberries.
  5. Place the batter in a lined muffin tin ( if you don’t have liners, you can grease each cup with more coconut oil), and bake at 400 degrees for 15-20 minutes, or until a toothpick comes out clean with a few crumbs when inserted into the middle of a muffin.
  6. Take a spoon and eat the leftover batter while waiting for them to bake;)
  7. Let cool and enjoy!

Yum!! My mouth is watering just thinking about them. Enjoy your muffins!

Yours Truly, MyDayIsBooked;)

Healthy Cinnamon Dried Apples

Hey guys! I’m super sorry about not posting for awhile- a horrible way to start off 2018, I know. Hopefully I can make it up to you with these delicious dried apples- they’re one of my favourite snacks! With no added sugar and plenty of apple-pie flavour, they’re sure to please any sweet-tooth while providing you with a healthy snack. Lets get into the recipe!

Ingredients:

  • 2-3 large apples
  • As much cinnamon as you want!


Directions:

  • Preheat your oven to 250 degrees Fahrenheit
  • Wash your apples
  • Slice the apples. This is the tricky part, because you want to get the thickness just right. If you want your apples to be super crispy, since the very thin, but if you would like them a bit chewier leave them thicker. If its you’re first time making this recipe, I suggest that you do a few thin and a few thick to see what you like best.img_8533
  • Place the apples on a parchment-covered baking sheet so that they don’t stick to the pan.
  • Now it’s time for the cinnamon! Sprinkle some on each since and then rub it around with your finger for an even coating. If you’re not a big fan of cinnamon, you can leave it off, but it really adds to the flavour of the apples.
  • Bake the apples for about 2 hours. About halfway through, take out the pan and flip the slices over so that you can put some more cinnamon on the other side. Again, if you would prefer to leave the cinnamon off, you can, but you still need to flip the apples.
  • Take out of the oven and enjoy! Store these in an airtight container in the fridge.


That’s all! Super simple and super delicious. I promise that there will be 2 more pots this week- a bookish one and a crafty one! Enjoy these apples and I’ll see you then!!

Yours Truly, MyDayIsBooked;)))

Quinoa Salad

This Quinoa Salad is great for school lunches if you make it the night before! It’s bright, flavourful,  and bursting with veggies. For protein, you can add in any kind of meat that you want! best of all, it’s super easy. So, before you start drooling all over your screen, let me get into the recipe.;))

Ingredients:

  • 1/4 cup quinoa
  • 1/2 cup diced cucumber
  • 1/2 cup diced peppers
  • 1 sprig of green onion
  • 1 teaspoon dill
  • 1 teaspoon parsley
  • 1 teaspoon cilantro
  • The juice of 1/2 a lemon
  • Protein of your choice


Directions:

Follow the cooking instructions on the package of your quinoa. Once you’re done, it should look something like this:

IMG_8272

Looks super appetizing, right? Don’t worry, once you add all of the veggies and herbs, it looks way better. While the quinoa is cooling down, dice your pepper, cucumber and green onion into mid-sized pieces and cut your lemon in half, like this:

IMG_8270

Now take your quinoa and add the cilantro, dill, and parsley to it, followed by the veggies. Finally, squeeze the lemon juice into the salad. Store this in a container in the fridge and enjoy it for lunch the next day!

IMG_8274

As for protein, you can really add anything you want. I usually put hemp seeds in mine, but chicken would go great as well.

I hope that you like this recipe! Make sure that you let me know what you think of it in the comments section! See you tomorrow for Day 10 of 12 Days of Awesome Ways to Be Healthier.;))

Yours Truly, MyDayIsBooked