https://mydayisbooked.com/2020/10/30/pumpkin-date-granola/

Pumpkin Date Granola

You know how I love my granola! Couldn’t let fall pass without making a nice pumpkin one😍😍 With this I used up the rest of the pumpkin purée I had frozen which was perfect. I used the first half in my Pumpkin Oat Cookies, which you should definitely check out because they are delicious.

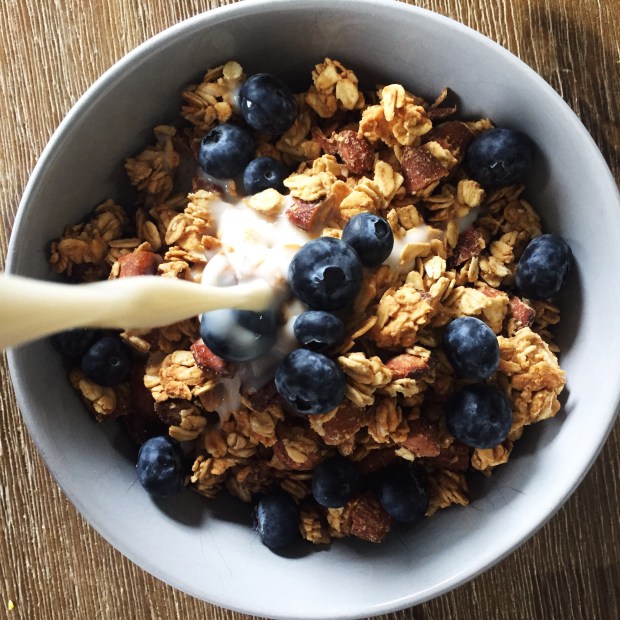
In this granola, we’ve got a LOT of pumpkin flavour, as well as pumpkin seeds, puffed wheat, and dates for sweetness🙌 And you’d better believe that some magic is gonna happen in the oven and you’ll be left with some serious clusters. What is a granola without the clusters? This stuff makes the perfect healthy breakfast. It’s vegan and refined sugar free, and goes great with milk, yogurt, oats, or on a smoothie bowl!😍

It only takes about 30 minutes to whip up this recipe, so you can make it in a flash when you feel like you need a quick snack or dessert. Pumpkin muffins and stuff are so overrated. This granola is so versatile and crunchy and way more tasty. I’ve got a big container of it in my fridge right now and can’t wait to eat it all up❤️

Hope you enjoy!

Pumpkin Date Granola

Serves: 4-6

Total Time: 30 minutes

Ingredients:

  • 2 cups quick or rolled oats
  • 1 cup puffed wheat
  • 1/2 cup shelled and roasted pumpkin seeds, salted
  • 3 dates, chopped
  • 1/4 cup maple syrup
  • 3/4 cup unsweetened pumpkin purée
  • 1 tbsp coconut oil, melted
  • 1 tsp cinnamon
  • 1/2 tsp allspice
  • 1/2 tsp ginger

Directions:

  1. Preheat your oven to 375 degrees Fahrenheit.
  2. Mix together the oats, puffed wheat, pumpkin seeds and chopped dates in a large bowl and set aside.
  3. Stir together the pumpkin, coconut oil, maple syrup and spices in a separate, small bowl. Add into the oat mixture and mix until everything is throughly combined.
  4. Spread the granola in an even layer on a parchment lined baking sheet, and place in the oven for 15 minutes.
  5. Increase the heat to 400 degrees Fahrenheit and continue to bake for another 2-5 minutes. Keep a close eye on the granola at this point, as it can burn quickly.
  6. Remove from the oven and enjoy!

This recipe is so good! Let me know if you decide to make it! Have a great weekend:)

Yours Truly,

Olivia:))

2 Summer Smoothie Bowls

Smoothie bowls are my ABSOLUTE favourite breakfast! They’re so refreshing, and make me feel like I’m having a treat on vacation somewhere. You can pack a bunch of veggies in there without even noticing, and the topping combos are endless. ENDLESS!

It took me a while to get the perfect smoothie bowl thickness, but I think I’ve finally cracked the code. You want to have the ingredients as cold as possible, and limit the amount of watery fruits that you put in your smoothie. The base of all of my smoothies is a frozen banana, because that’s what makes them thick and creamy. If you don’t like banana you can try using mango, because I’ve found it has a similar effect. The ingredients might take a little while to come together in the blender, but eventually they’ll form a mixture that’s almost like soft serve in texture. Using a tamper is critical here, because you can continually push the ingredients towards the blender blades.

In this post, I’ve included two different recipes for summer smoothie bowls, because I couldn’t decide which one to pick! One has banana, berries, and spinach, and the other has banana, spinach, kale, and watermelon. Yum! My watermelon didn’t get completely frozen, and so the result was a slightly more watery smoothie bowl. Make sure that you leave it in the freezer at least overnight! These recipes are definitely some of my favourites though, because they TASTE LIKE SUMMER and allow you to get some greens in!

Lets talk toppings. Really anything goes when you’re topping your smoothie bowl, but some ideas are more fruit, granola, dates, nut, seeds, and nut butters. I like a few different toppings on my bowl because it keeps things interesting. Some granola recipes that go GREAT on smoothie bowls are my Nutty Granola and Chocolate Coconut Granola. I’ve also been known to top my bowls with a Seedy Energy Square or two….. it’s so good!

I hope that these recipes get you hooked on smoothie bowls!

Berry and Spinach Smoothie Bowl

Serves: 1

Total Time: 10 minutes

Ingredients:

For the Bowl:

  • 1 frozen banana (sliced)
  • 3/4 cup frozen blueberries
  • 3/4 cup spinach (not packed)
  • 2 tbsp water

For the Toppings:

Directions:

  1. Add all of the smoothie ingredients to a powerful blender and blend on low, using the tamper to push the ingredients down.
  2. Once the ingredients are starting to come together, turn the speed to medium and continue using the tamper. It may seem like you need to add more water, but continue until a thick, soft-serve like mixture forms. This can take a few minutes.
  3. Scoop the smoothie into a bowl and top with the strawberries, granola, and peanut butter.
  4. Enjoy!

Greens and Watermelon Smoothie Bowl

Serves: 1

Total Time: 10 minutes

Ingredients:

For the Bowl:

  • 1 frozen banana (sliced)
  • 3/4 cup frozen water melon chunks
  • 1/2 cup kale leaves (loosely packed)
  • 1/2 cup spinach (loosely packed)
  • 1 tbsp water

For the Toppings:

Directions:

  1. Add all of the smoothie ingredients to a powerful blender and blend on low, using the tamper to push the ingredients down.
  2. Once the ingredients are starting to come together, turn the speed to medium and continue using the tamper. It may seem like you need to add more water, but continue until a thick, soft-serve like mixture forms. This can take a few minutes.
  3. Scoop the smoothie into a bowl and top with the chopped dates, granola, and peanut butter.
  4. Enjoy!

I know I’ll be enjoying these bowls all summer long! Thanks for reading and I’ll see you Wednesday:))

Yours Truly,

Olivia

Nutty Granola

Hey guys! I have another granola recipe for you today because as you know, granola is one of my true loves. This one is actually really simple, it only uses one…two…three…four ingredients! Just had to count em up in my head there. Plus you don’t need any oil, unless you count peanut butter as an oil. I count it as spreadable gold.

There are also loooots of nuts in this granola, because who doesn’t love a nutty granola? I used almonds and pecans from a jar of mixed nuts. Why not use all of the mixed nuts, you ask? BECAUSE I”M ALLERGIC TO CASHEWS AND PISTACHIOS AND I’M REALLY MAD ABOUT IT! They make my mouth all itchy which is really inconvenient, because like every vegan cheesecake or creamy pasta sauce recipe ever has cashews in it. (Except for my Creamy Mushroom and Hummus Pasta which is an awesome alternative for my fellow cashew allergen people). But anyways, I love me some almonds and pecans so it’s all good. I know you might be running short on supplies right now, so if you absolutely positively cannot get your hands on almonds and pecans, you can use other nuts or even some seeds if you’re super desperate. I’m sorry, but nuts are just superior to seeds. Like would you rather have some peanut butter or like, pumpkin seed butter? I’ve never actually had pumpkin seed butter but based on my experience with peanut butter I’m going to say that it’s better.

Back to the granola. It’s sweet and nutty and crunchy, and you’ve also got some nice big clusters in there. If you’re not using salted nut butter, you could top it off with a little sea salt at the end for an extra hit of perfection. I will definitely be making this recipe again!

Nutty Granola

Serves: 3-4

Total Time: 25 minutes

Ingredients:

  • 2 1/2 cups rolled oats
  • 3/4 cup roughly chopped almonds and pecans (you still want some nice chunks in there)
  • 1/4 cup smooth natural peanut butter
  • 1/4 cup pure maple syrup

Directions:

  1. Preheat your oven to 375 degrees Fahrenheit.
  2. Mix together the nuts and oats in a large bowl. Set aside.
  3. In a small bowl, add in the peanut butter and maple syrup and microwave for about 30-45 seconds, until the peanut butter is nice and melty. Mix together until smooth.
  4. Add the maple syrup and peanut butter mixture into the oats and nuts and stir until everything is evenly coated. Spread the granola out onto a parchment lined baking sheet and bake for about 10 minutes.
  5. Remove the granola from the oven and give it a little stir, trying not to break up any clusters that are forming (because lets be honest, those are the best part). Return the pan to the oven and bake for another 5-8 minutes, until the granola is golden brown.
  6. Take out the granola, let cool and enjoy!

Hope you enjoy this nutty granola! See you soon;))

Yours Truly,

MyDayIsBooked;))

Apple and Peanut Butter Granola

Hi guys! I haven’t done a breakfast recipe in a while, and so I’d thought I’d share this Apple and Peanut Butter Granola. One of the first food posts on my blog is a homemade granola, and it’s pretty good, but when it comes to this recipe, I have one word for you; CLUSTERS! The mixture of mashed banana, peanut butter and vanilla creates more of a sticky “batter” when mixed with oats, and allows for big, delicious clusters to form. I also added in some apples and sunflower seeds, which give sweetness and earthiness. This granola would be great on top of smoothie bowls, yogurt, or simply with some almond milk.

Apple and Peanut Butter Granola

Serves: 4-6

Total Time: 40 minutes

Ingredients:

  • 2 ripe bananas
  • 1/2 cup creamy natural peanut butter
  • 1 tbsp vanilla
  • 2 1/2 cups oats
  • 1/2 cup sunflower seeds (or chopped nuts of your choice)
  • 1 apple, diced

Directions:

  1. Preheat your oven to 375 degrees Fahrenheit
  2. In a large bowl, mash the bananas and mix them with the peanut butter and vanilla.
  3. Add in the oats, sunflower seeds, and diced apple.
  4. Mix until the dry ingredients are coated in the peanut butter and banana mixture.
  5. Spread out the granola on a parchment lined baking sheet.
  6. Bake for about 15 minutes, then take out of the oven and stir around the granola, staring to separate the clusters.
  7. Place back into the oven until the granola is golden brown.
  8. Enjoy!

Hope you like this easy breakfast recipe! It should keep in the fridge for about a week and a half, so it’s great for meal prepping;) I’ll see you next week with more great summer posts!

Yours Truly,

MyDayIsBooked;)