Posts

Peanut Butter Cluster Nice Cream

It’s summer so bring on the ice cold treats! Nice cream is one of my favourites because it’s super fast, tasty, and CREAMY, all without any dairy or refined sugar. I’ve made Neapolitan Nice Cream in the past, but today I made PEANUT BUTTER CLUSTER NICE CREAM. There are actual PEANUT BUTTER CLUSTERS in here. Summer, here we come.

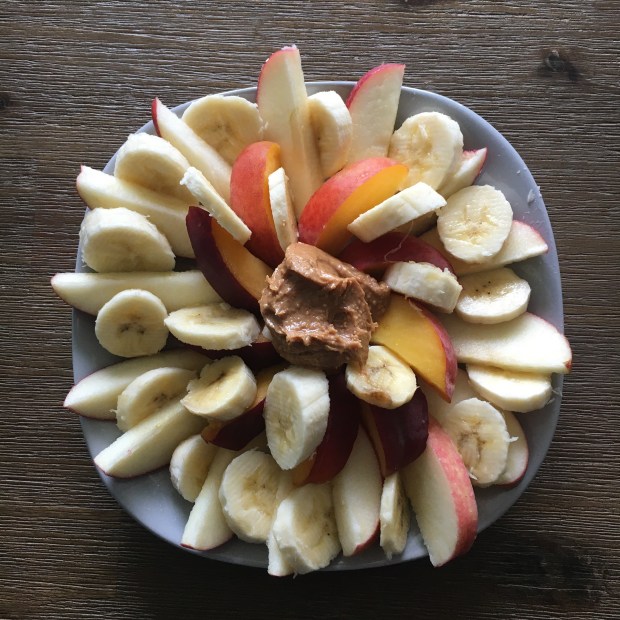
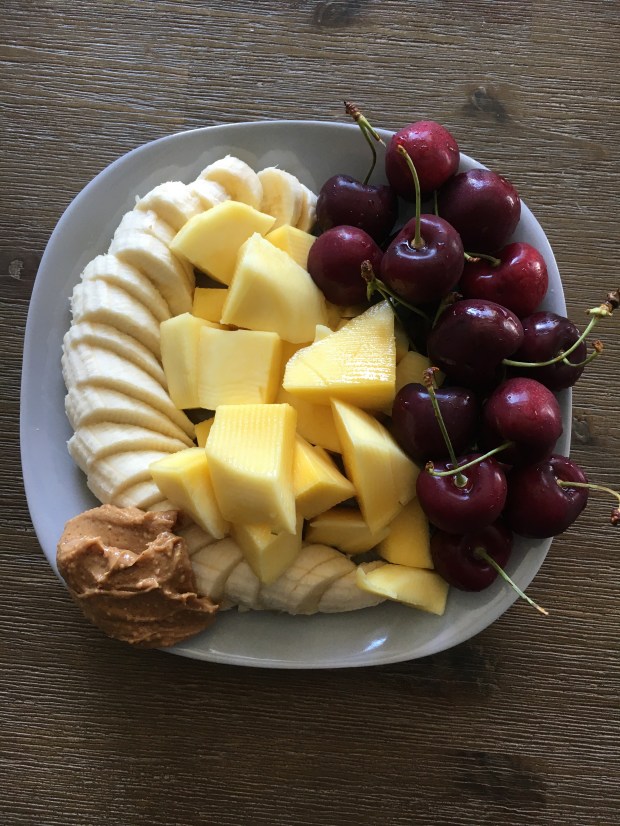
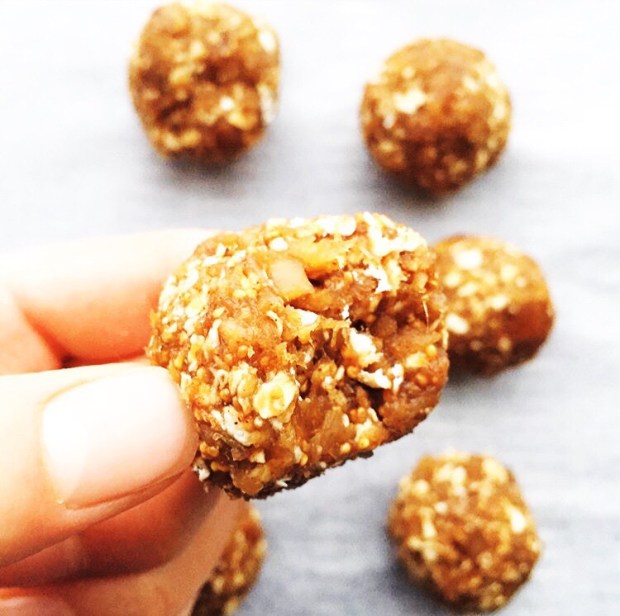
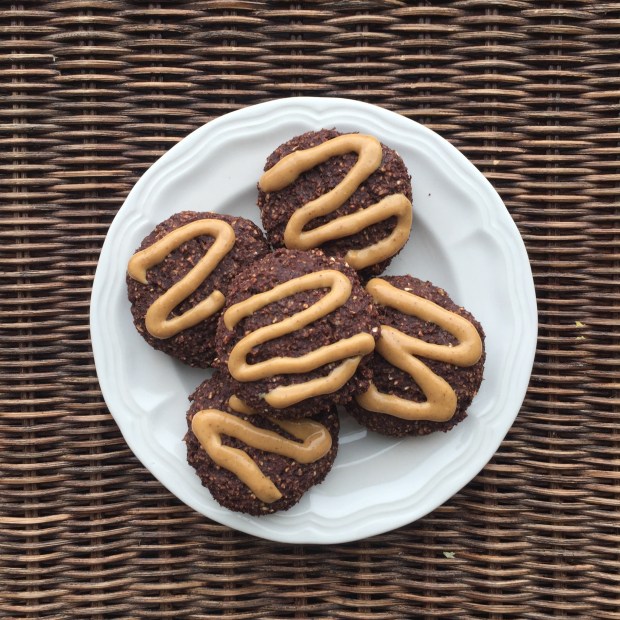
All nice cream is is basically blended up frozen bananas. It has an amazing texture and is also really good for you:) Because of this magic, I ALWAYS include a frozen banana in my smoothie bowls. From now on I might throw these peanut butter clusters on my smoothie bowls too cause they’re pretty darn delicious. I made them using oat flour- which is just ground up oats. So yeah, you’ll be needing a good blender to make this recipe. The peanut butter clusters also contain peanut butter 😋, maple syrup, vanilla, and some dark chocolate chunks. I DEFINITELY recommend using crunchy peanut butter for these, because then you get some peanut pieces in there. I’ve actually been converted from team creamy to team crunchy, cause I love those peanuts❤️ If you don’t feel like making nice cream, these clusters would make a greet breakfast with some almond milk or yogurt, or a nice snack on their own.

Once you have the nice cream made and the peanut clusters rolled and frozen, you fold the two together and BOOM! A super delicious summer treat. Let’s be honest though, I will probably be eating this all year long. Hope you enjoy this recipe, and be sure to let me know some other nice cream flavours that you want me to make a recipe for!

Peanut Butter Cluster Nice Cream

Serves: 3

Total Time: 210 minutes

Ingredients:

For the Peanut Butter Clusters:

  • 1 cup oat flour
  • 2 1/2 tbsp maple syrup
  • 1 tsp vanilla extract
  • 3 tbsp runny or melted crunchy peanut butter
  • 2 tbsp dark chocolate chunks

For the Nice Cream:

  • 3 bananas, sliced and frozen
  • 1/2 tsp vanilla
  • Splash of water

Directions:

  1. Mix all of the peanut butter cluster ingredients together in a bowl. Roll into 1/2 tsp sized balls, then put into a container and freeze for about 2 hours, so that they’re easier to mix in with the nice cream.
  2. Once the peanut butter clusters are ready, throw the frozen banana, vanilla and SPLASH of water into the blender. You don’t need to much water, or else you’ll miss out on that creamy texture. Use the tamper to push the bananas down and blend until smooth. You want a nice swirl like this:

3. Scoop the nice cream into a parchment lined loaf pan, and mix in about half of the peanut butter clusters. Place in the freezer for another hour until the texture resembles ice cream. Serve with the rest of the clusters on top!!

This stuff is legit SO good and you should for sure make some ASAP. Perfect for a hot day!

Yours Truly,

Olivia:))

Roasted Carrot and Onion Dip

Dips are where it’s at, you know? Whenever there’s hummus in the house I eat it all in about 5 seconds because I throw it on everything. But when I don’t have hummus OR chickpeas around, I still need my dip/spread fix! So I present to you, ROASTED CARROT AND ONION DIP.

Ok guys, this dip… where do I even start? First off, it’s incredibly easy to make. You just roast a bunch of delicious veg, including carrots and red onion (who would’ve guessed😂), then toss them into the blender with parsley, olive oil, and some water. So freaking simple and so freaking worth it. After you get past the gorgeous colour, you will notice that the flavour of this dip is insaaannneee. Like insane. Mainly because you will be roasting garlic alongside the carrots and onions, and have you ever tried roasted garlic?!?! I need to roast it more often cause it’s amazing. On top of that you have some lime juice, which is just the cherry on top. All of these sweet, smoky and sour flavours working together are just heaven for your tastebuds.

I’ve eaten this dip/spread in a salad, with some brown rice crackers, and with some snap peas, but there are a whole lot more ways that I’d like to enjoy it. It would be SO GOOD in a sandwich or wrap, with some toasty pita, or on your morning toast. Honestly, just slather this on anything and it will make it 10000 times better. That’s 4 zeros my friends👌

Hope you enjoy this recipe! Let me know how it turns out when you make it😊

Roasted Carrot and Onion Dip

Serves: 4

Total Time: 45 minutes

Ingredients:

  • 5 small carrots, peeled and chopped into 1 inch pieces
  • 1 small red onion, sliced
  • 2 tbsp + 1/2 tsp + 1/4 cup olive oil
  • 1/2 cup packed parsley
  • 4 cloves or garlic, skins on
  • 3 tbsp water
  • Juice of 1/2 a lime
  • Salt and pepper to taste

Directions:

  1. Preheat your oven to 400 degrees Fahrenheit.
  2. On a parchment lined baking sheet, toss the carrots and onions with the 2 tbsp olive oil and some salt and pepper.
  3. Place the garlic cloves on a small piece of aluminum foil (shiny side up) and add the 1/2 tsp of olive oil. Fold the foil around the cloves to make a little packet. Place on the baking sheet.
  4. Roast the carrots, onion and garlic in the oven for about 25-30 minutes, until soft and caramelized. Remove from the oven and let cool completely.
  5. Add the parsley, lime juice, water and 1/4 cup olive oil to a good blender. Remove the garlic cloves from the little packet and from their skins, and add them to the blender as well, along with the carrots and onions. Blend the mixture until fairly smooth; you should still be able to see the green flecks of parsley.
  6. Season with more salt and pepper if needed.
  7. Serve with crackers and veggies, or in bowls, sandwiches and wraps!

Definitely try this one out! See you Wednesday:))

Yours Truly,

Olivia:))

3 Flavours of Crispy Chickpeas

Chickpeas are just the best. They have to be one of the most versatile ingredients out there. You can make hummus, falafel, edible cookie dough, cookies, or blondies from them, and you can even make meringues if you whip up the water or aquafaba from the can. But today we are celebrating the humble chickpea by just crisping them up in the oven- one of my favourite methods of preparing them.

These crispy chickpeas are the PERFECT addition to your salads, bowls, and wraps, plus they make a great snack on their own. Also, have you ever tried a chickpea salad sandwich?!!? Mix up your roasted chickpeas with some mashed avo and green onion, throw it in between two pieces of bread, and you’ve got yourself a LUNCH!

While just roasting chickpeas with salt and pepper is pretty delish, I’ve come up with three spice combos that take them to the next level. We’ve got taco-spiced chickpeas, curry-spiced chickpeas, and some soy-maple chickpeas. I think the soy-maple ones have to be my favourite, but the other two are pretty darn good as well. You could use the taco-spiced ones as a replacement for beef in tacos, and the curry-spiced chickpeas are a great snack by themselves. Make sure you try all three and let me know which one is your fave!!

3 Flavours of Crispy Chickpeas

Total Time: 40 minutes

Ingredients:

Taco-Spiced Chickpeas:

  • 1/2 a can of chickpeas, drained and rinsed
  • 1 tsp olive oil
  • 1 tsp cumin
  • 1 tsp chilli powder
  • 1/2 tsp paprika
  • 1/2 tsp oregano
  • 1/4 tsp cayenne powder
  • 1/2 tsp garlic powder
  • Sprinkle of salt and pepper

Curry-Spiced Chickpeas:

  • 1/2 a can of chickpeas, drained and rinsed
  • 1 tsp olive oil
  • 1/2 tsp garlic powder
  • 1/2 tsp cumin
  • 1 tsp curry powder
  • 1/2 tsp coriander
  • Sprinkle of salt and pepper

Soy-Maple Chickpeas:

  • 1/2 a can of chickpeas, drained and rinsed
  • 1/2 tsp garlic powder
  • 1 tsp soy sauce
  • 1/2 tsp maple syrup
  • 1/2 tsp ground ginger
  • Sprinkle of chilli flakes
  • Sprinkle of salt and pepper

Directions:

  1. Preheat your oven to 400 degrees Fahrenheit.
  2. In three separate bowls, mix together the chickpeas with the spices and oil for each flavour. Dump the chickpeas onto a parchment lined baking sheet.
  3. Bake the chickpeas for about 30 minutes, until they’re nice and crispy. Remove from the oven and enjoy!!

Have fun with this simple snack recipe!!

Yours Truly,

Olivia:))

10 Healthy Breakfast Ideas

Breakfast is probably my favourite meal of the day, mostly because I get to make it sweet. I’m definitely a sweet over savoury breakfast person, because when you get to eat sweet stuff for an actual MEAL why wouldn’t you? I’ve posted a lot of breakfast recipes over the years, but I’d thought I’d compile a list of 10 Healthy Breakfast Ideas that you can make when you’re in a slump.

All of these are super simple and quick to make, and a couple can be made in advance to prepare for busy mornings. No matter how busy I am, I ALWAYS make time for breakfast, because it fuels me for the rest of the day. Fruit, complex carbs, protein and healthy fats are essential to an awesome breakfast, so you can kick butt all day long! Plus, breakfast needs to taste good, and all these recipes are DELISH. they have so much flavour and sweetness without any refined sugar.

I hope you find a couple of recipes in here that you really love and can keep coming back to! Enjoy;))

Pancakes

I have two pancake recipes on my blog: PB and J Stuffed Pancakes and Cinnamon Raisin Apple Pancakes. Both are made with oat flour and are SO YUM. Pancakes are a classic breakfast food, and can actually be whipped up pretty fast. My PB and J Stuffed Pancakes come together in a blender and take only a few minutes to cook. You could even make a big batch of either of these and freeze them, then pop them in the microwave or toaster for an on-the-go breakfast.

Muffins

Who doesn’t love a good muffins? They’re the epitome of a grab-and-go breakfast and taste amazing! My Scrumptious Sugar-Free Muffins are a CLASSIC and are probably my favourite muffin recipe. Then you’ve also got my Carrot and Apple Muffins, and my Mini Berry Protein Muffins. I always have some muffins in the freezer for food emergencies!

Oatmeal

Oatmeal is so good for you and makes such a heart-warming breakfast. Both of these oatmeal recipes come together in under 20 minutes, and are super tasty! On the left is my Carrot Cake Oatmeal– it has lots of spices, carrot, and some dates instead of raisins. Then you have my Vanilla Protein Oats, which have protein powder in them for a little boost in the mornings!!

Granola

I absolutely love granola- whether it’s on top of yogurt or a smoothie bowl, or just with some almond milk. Here we have my Apple and Peanut Butter Granola, Chocolate Coconut Granola, and Nutty Granola!! Granola is easy to make and can be stored in the fridge until you need to use it. Stock up for some very tasty future breakfasts!

Fruit Plates

These aren’t really a “recipe” per se, but whenever I don’t feel like making a fancy breakfast I just cut up a bunch of fruit, add some peanut butter, and go to town! I love fruit so much and I could eat it all day, so this is the perfect breakfast for me.

Smoothie Bowls

Smoothie Bowls are my favourite breakfast of all time. I like using frozen bananas to make them thick and creamy, and so it’s kind of like eating ice cream for breakfast. They’re a great way to eat lots of fruits and veg for breakfast, and the toppings are endless! On the right is my Berry Banana Smoothie Bowl, on the left is my Watermelon and Greens smoothie bowl from my post on 2 Summer Smoothie Bowls, and in the middle is the bowl I’ve been eating almost every day recently- just blend up a frozen banana, some spinach, blueberries, and a scoop of protein powder with some water and top with peanut butter and more blueberries. Yum!!!

French Toast

I have this awesome recipe for Lemon French Toast that you should definitely try out! It’s vegan, made with sprouted grain bread, and tastes so good! Serve with some fresh fruit and maple syrup for the perfect weekend breakfast.

Quinoa Bowls

I’ve been eating more of these quinoa breakfast bowls lately too. Quinoa is super good for you- it contains 9 essential amino acids- which makes it a great way to start your day! I cook it with almond milk and top it with lots of fruit and nut butter. Here’s the recipe for my Cherry, Peach and Quinoa Breakfast Bowls.

Energy Balls and Bars

Energy balls and/or bars are another quick and easy breakfast that you can make ahead! You can add pretty much anything you wan to them, which makes them super tasty and customizable. From left to right, I have my Fig Bites, Seedy Energy Squares, and Chocolate Zucchini Energy Bites.

Cookies

Cookies aren’t your typical breakfast food, but these two recipes are so healthy that eating them for breakfast could become a regular thing! I love both of them- my Chocolate Dipped Pumpkin Seed Cookies, and my Chocolate Peanut Butter Drizzle Cookies. Chocolate for breakfast is now a thing.

Happy Breakfasting!!

Yours Truly,

Olivia:))

August 2020 Bullet Journal Set-Up

July just flew by, and I’m sad to see my Anne of Green Gables theme go, but I’m absolutely IN LOVE with my theme for August!! At first I was kind of going for a Spanish tile look, but now that I’m done I’m totally getting Mediterranean vibes. I used the fine tip of my light blue Tombow Dual Brush Pen, and a darker blue crayola marker, as well as my gold brush pen from the dollar store, my white Gelly Roll pen, and a finer gold gel pen. I haven’t used my bigger Tombow markers in a while because the brush tip is a little to big for the size of my journal, but the fine tip works perfectly here and I love the colour.

I also didn’t use ANY black in this entire set up and I plan to keep it that way! It just makes it feel really clean and simple and bright, which I love for summer. These spreads are pretty simple in general, cause I wanted a bit of a break from lots of drawing. The tiles are easy to draw because I used the dotted lines as a guide. I also varied the tile sizes a bit to keep things interesting.

I hope you like this month’s set-up and can pull some inspiration from it! I love love love how it turned out and I can’t wait to come up with some more weekly spreads:))

Here’s my title page! I drew 12 tiles that are 8×8 dots each, leaving some space at the top and bottom. It was lots of fun drawing out all these different designs! After I had coloured everything in, I went over the darker blue parts with my white gel pen for some extra detail. Then I wrote August in gold in a simple lowercase font. My quote for this month is “Go bravely, go deeply, or do not go”. While I don’t officially have a focus for this month, I want to make it a priority to give 110% in everything.

Again, I’ve been liking this half page calendar layout a lot! I might have to switch back to a full page one once school stuff starts up again, but for now I’m enjoying this look. I have space for my goals, events, and tasks, and then just my little calendar to write a few important dates down and keep track of what day it is (because when it’s summer AND Covid it’s hard to know). I messed up on my calendar because I forgot that August ends on a Monday and kept drawing circles until the end of the week. But I managed to cover it up by doing some little doodles, and then I did more in the top row too so it looks intentional. And yeah, I drew some smaller tiles here to which I think are so cute:)

My trackers spread is just super clean and simple. I think I’m just going to stick with this horizontal style because I just love the way it looks and how simple it is to fill out. I used a finer gold gel pen to write smaller, because I didn’t want to use black. And then I also have a workout tracker to keep tabs on my fitness.

These pages turned out great and it makes me happy just looking at them!! I did more small tiles for my gratitude log, and bigger tiles over on my blog planner. I haven’t included a blog planner in a while because I wasn’t really using it, but recently I started planning out my posts in advance and it’s helped me a ton, so hopefully I can plan stuff more using this.

And finally, my first weekly spread. Super simple; just some tiles and the first letter of the days of the week. I had another head-smacking moment as I started the week off with Sunday, and then I was like oh shoot, August first is a SATURDAY. I really didn’t want to paste paper on top or mess it up, so I just put Saturday and Sunday together into one box and whatever. I also ended up writing the dates in with my gold gel pen, but it didn’t make it into this photo.

There’s my set up for August!! It’s one of my favourite ones I think; I just love the colours and the simplicity. I had a few little hiccups but it turned out great in the end! Let me know what you think of it and I’ll see you guys Wednesday with another post:)))

Yours Truly,

Olivia:))